A sanding sponge usually tears at the corners because the foam edge is catching on a sharp surface or receiving too much pressure. Check the abrasive, sanding technique, workpiece edges, and sponge condition before replacing it.
A sanding sponge usually tears at the corners because the foam edge is catching on a sharp surface, being pressed too hard, or wearing unevenly. Stop using it if loose abrasive or torn foam could affect the finish, then check the sponge and the workpiece in the order below.
Check the sanding sponge first
Inspect the sponge before changing your technique. Look for:
A corner that has separated from the foam
Exposed or missing abrasive material
Hardened glue or debris along an edge
A sponge that is compressed, permanently bent, or saturated with finish
Uneven wear caused by using one corner repeatedly
A slightly rounded, worn corner is normal. A split corner or loose abrasive means the sponge is no longer making consistent contact. Replace it rather than trimming away a damaged section, since trimming can make the remaining edges more likely to catch.
Also confirm that the sponge is appropriate for the material. A coarse abrasive used aggressively on rough wood, cured filler, or old paint can remove material quickly and put more stress on the foam corners than a finer abrasive would.
Reduce pressure and change your grip
Excessive pressure is one of the most common reasons a sanding sponge tears. Pressing harder does not necessarily sand faster; it can deform the foam and force a corner into the workpiece.
Use light, even pressure and let the abrasive do the cutting. Hold the sponge with your fingers spread across its broad face instead of pinching one end. Keep as much of the flat surface in contact with the work as possible.
Avoid twisting the sponge while it is moving. A twisting motion can drag one corner sideways and tear the foam, especially when sanding a rough edge or a partly dried finish.
For small areas, use short, controlled strokes. When sanding a larger flat surface, periodically change the direction of your strokes and rotate the sponge so one corner does not receive all the wear.
Product prices and availability are accurate as of the date/time indicated and are subject to change. Any price and availability information displayed on Amazon.com at the time of purchase will apply to the purchase of this product.
Inspect the workpiece for sharp edges or snags
A sharp corner on the workpiece can act like a blade against the sponge. This is especially likely with raw plywood edges, splintered wood, dried filler, raised grain, and chipped paint.
Before continuing:
Run a finger lightly near the edge to locate rough spots. Do not slide your finger across a sharp edge.
Knock down splinters or raised burrs with a few light strokes.
Sand across the edge rather than driving the sponge directly into it.
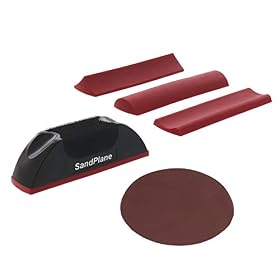
Use a sanding block or folded sandpaper if the edge is too sharp for a soft sponge.
A sanding sponge is useful because it conforms to profiles and inside corners, but that flexibility also allows its edge to wrap around and catch on a sharp point. On a crisp, square edge, a firmer block or sheet of sandpaper may last longer.
Product prices and availability are accurate as of the date/time indicated and are subject to change. Any price and availability information displayed on Amazon.com at the time of purchase will apply to the purchase of this product.
Use the correct grit and abrasive type
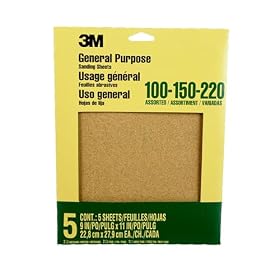
A coarse grit can tear or load a sponge faster when used with heavy pressure. Start with the least aggressive grit that can remove the defect, then move to a finer grit for smoothing.
Choose the abrasive for the job:
Raw wood: Use a grit appropriate to the amount of leveling required, then progress finer to remove scratches.
Paint or finish: A finer grit is often better for scuffing or smoothing without cutting deeply into the coating.
Filler or patched areas: Remove high spots carefully and avoid forcing the sponge into hard transitions.
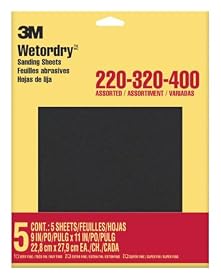
Between coats: Use a fine abrasive and light pressure; the goal is usually to smooth dust nibs rather than remove substantial material.
If the sponge tears only when working on one material, the surface may be too rough or the chosen grit may be too aggressive for that stage. If it tears across several materials, pressure, storage damage, or a weak edge is more likely.
Product prices and availability are accurate as of the date/time indicated and are subject to change. Any price and availability information displayed on Amazon.com at the time of purchase will apply to the purchase of this product.
Keep the sponge clean and dry
Dust, paint residue, and finish can build up along the edges. A hardened deposit creates a high spot that catches on the workpiece and concentrates force at one corner.
For a reusable sponge, follow the manufacturer’s cleaning instructions. If it can be rinsed, remove loose dust and allow it to dry completely before storage. Do not continue sanding with a wet or softened sponge unless the product is specifically designed for wet sanding.
Do not store sanding sponges crushed under tools or tightly folded. Keep them flat or in a container where the corners are not bent. Heat, solvents, and uncured finishes can also damage foam or adhesives, so follow the product’s storage guidance.
Use a different format for sharp edges and flat work
Replacing the sponge with another identical sponge may not solve the problem if the job is hard on soft foam. Consider the surface shape:
Use a sanding block or folded sheet for flat faces and crisp edges.
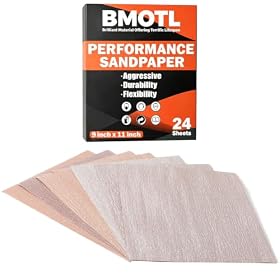
Use a sheet of sandpaper when you need to reach a narrow edge without a foam corner.
Use a sanding sponge for contours, profiles, and areas where flexible support is helpful.
Use a finer, less aggressive abrasive for delicate finish work.
When switching formats, keep the same general progression of grits and avoid jumping from a very coarse abrasive directly to a fine finishing abrasive if visible scratches remain.
When to replace the sponge
Replace the sanding sponge when a corner is split, the abrasive is peeling, the foam no longer holds its shape, or the surface is clogged and cannot be cleaned according to the instructions. A damaged sponge can create uneven sanding and may leave deeper scratches than expected.
If new sponges repeatedly tear at the same spot, stop and inspect the workpiece for a splinter, nail edge, fastener, dried drip, or other protrusion. If the surface is sound, use less pressure or switch to a block or sheet format better suited to that edge.
Wear eye protection when sanding, control dust with appropriate ventilation or dust collection, and follow the finish or coating manufacturer’s precautions—particularly when removing old paint or other potentially hazardous coatings.
FAQ
Why does my sanding sponge keep tearing on one corner?
The corner is probably catching on a sharp edge, splinter, dried finish, or rough filler. It can also happen when one corner receives repeated pressure or the sponge is twisted during sanding. Inspect the workpiece, use lighter pressure, and rotate the sponge regularly.
Can I cut off the torn corner of a sanding sponge?
It is usually better to replace the sponge. Cutting away a damaged corner can leave an uneven edge that catches again and may make sanding less consistent.
Should I use a sanding block instead of a sponge?
A sanding block is often better for flat surfaces and crisp edges because it keeps the abrasive supported and reduces corner deformation. A sponge is more useful for contours, profiles, and areas that need flexible contact.
Does a coarser grit make a sanding sponge tear faster?
It can. Coarse abrasive removes material more aggressively and may put greater stress on the foam, especially with heavy pressure or rough surfaces. Use the least aggressive grit that will do the job and let the abrasive cut without forcing it.