Best Sanding Sponge for Trim: How to Choose the Right Grit
The best sanding sponge for trim should match the profile of the molding, the finish you are removing, and the smoothness you need before painting. Here is how to choose the right grit and format without rounding over edges or leaving scratches.
Best sanding sponge for trim
The best sanding sponge for trim is usually a medium- or fine-grit sponge with a firm but slightly flexible abrasive surface. It should conform to profiles without collapsing into corners, while remaining firm enough to keep flat areas smooth. For most painted or primed trim, a medium grit is useful for removing light imperfections, followed by a fine grit before the final coat.
What to look for in a sanding sponge
Grit range
Grit determines how aggressively the sponge cuts and how visible its scratches may be:
Coarse grit: Useful for heavy buildup, rough wood, or difficult defects, but it can leave deep scratches and damage soft trim.
Medium grit: A practical starting point for scuffing painted trim, smoothing filler, and preparing surfaces for primer or paint.
Fine grit: Best for smoothing primer, removing minor raised fibers, and preparing a surface for a finish coat.
Extra-fine grit: Useful between coats when the surface is already fairly smooth. It is not usually the best choice for removing thick paint or uneven filler.
Grit numbering is not perfectly consistent across every abrasive system, so use the stated grit as a guide rather than assuming two products with similar labels will cut identically.
Shape and flexibility
A rectangular sanding sponge is versatile for casing, baseboards, and other mostly flat trim. A contoured or angled sponge can be easier to control on decorative molding, inside corners, and narrow profiles.
Choose a firm sponge when you need to keep a flat surface level. Choose a more flexible sponge when the trim has curves, grooves, or rounded edges. Very soft sponges can follow a profile well, but they may also round over sharp details if you press too hard.
Abrasive on multiple sides
Some sanding sponges have abrasive surfaces on several sides. This is useful for inside corners and narrow recesses, but check whether the abrasive side is appropriate for the area being sanded. A hard edge can mark an adjacent painted wall or a delicate trim profile.
Wet-or-dry capability
A sponge labeled for wet sanding can be used with a small amount of water when the finish and product instructions allow it. Wet sanding can reduce airborne dust and create a smoother result, but it is generally unsuitable for unfinished wood, water-sensitive filler, or trim that could absorb moisture. Let the surface dry completely before priming or painting.
Best grit for common trim jobs
Removing old paint or rough defects
Start with a medium-to-coarse abrasive only when the trim has substantial buildup, flaking paint, or rough filler. Use light pressure and stop as soon as the defect is removed. If the existing coating may contain lead, do not dry-sand it casually; follow applicable lead-safe procedures and local guidance.
Preparing painted trim for repainting
A medium or fine sanding sponge is normally sufficient for dulling a sound, glossy coating and smoothing minor imperfections. The goal is to create a clean, lightly abraded surface—not to remove every layer of paint.
Smoothing wood filler
Begin with medium grit to level filler, then switch to fine grit to reduce visible sanding marks. Keep the sponge flat on broad areas and use an edge or corner only where the profile requires it.
Sanding primer between coats
Use a fine or extra-fine sponge with light pressure. Primer often sands quickly, and aggressive abrasion can expose the substrate or create low spots around details.
Final smoothing before paint
A fine sponge is usually the safer option for a final pass. Remove dust afterward with a clean, dry method recommended by the paint manufacturer. Do not leave abrasive residue on the trim before applying paint.
Product prices and availability are accurate as of the date/time indicated and are subject to change. Any price and availability information displayed on Amazon.com at the time of purchase will apply to the purchase of this product.
Sanding sponge versus folded sandpaper
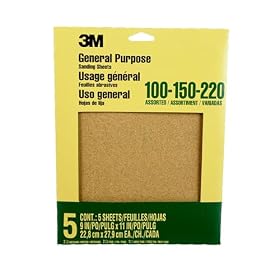
A sanding sponge is easier to grip and less likely to crease than folded sheet sandpaper. Its shape also makes it useful on rounded edges and decorative profiles. However, folded sandpaper can provide better control in very narrow grooves and may be less likely to alter a crisp edge when used carefully.
Use a sponge when:
The trim has curved or irregular profiles.
You need a comfortable hand-sanding block.
You are scuffing broad areas before repainting.
You want an abrasive that is less likely to fold into a deep crease.
Use folded paper or a small sanding block when:
The trim has sharp, square edges that must remain crisp.
You need to reach a narrow groove.
You want to replace the abrasive frequently at low cost.
You need a very flat sanding surface.
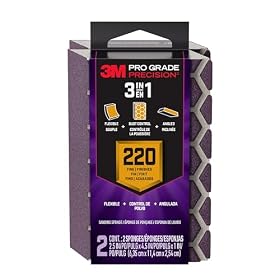
Fine-grit sanding sponge for primer and final smoothing
Product prices and availability are accurate as of the date/time indicated and are subject to change. Any price and availability information displayed on Amazon.com at the time of purchase will apply to the purchase of this product.
How to sand trim without damaging it
Clean the trim first. Remove grease, wax, loose dirt, and dust so the abrasive does not spread contaminants.
Test in an inconspicuous spot. Check how quickly the sponge cuts and whether it leaves a visible scratch pattern.
Start with the least aggressive grit that can do the job. You can always move to a coarser abrasive, but deep scratches take longer to remove.
Use light, even pressure. Let the abrasive do the work instead of pressing the sponge into the trim.
Keep crisp edges crisp. Sand broad faces separately and make only a light pass over sharp arrises. Repeated pressure on an edge can round it over.
Follow the wood grain where practical. This helps make scratches less noticeable, especially on exposed wood.
Change or clean the sponge when it loads up. Paint, primer, and filler can clog the abrasive and reduce cutting action.
Remove sanding dust before coating. Use the cleaning method recommended for the substrate and paint system.
Product prices and availability are accurate as of the date/time indicated and are subject to change. Any price and availability information displayed on Amazon.com at the time of purchase will apply to the purchase of this product.
Common buying mistakes
Choosing only coarse grit
Coarse abrasives remove material quickly but are often excessive for trim that only needs paint preparation. They can leave scratches that remain visible through primer and paint.
Using a soft sponge on every surface
A soft sponge can follow curves, but it may also create uneven pressure on flat trim. A firmer face is generally easier to control on casing and baseboards.
Ignoring the trim profile
A rectangular sponge may work well on flat casing but be awkward on crown molding or narrow decorative details. Consider the shape of the trim before choosing the format.
Sanding through a sound finish unnecessarily
If the old coating is firmly bonded, sanding should usually dull and smooth it rather than remove it completely. Removing stable layers creates extra work and may expose the substrate.
Reusing a clogged sponge too long
A loaded sponge can skid across the surface instead of cutting evenly. Replace it when cleaning no longer restores useful abrasion or when the surface becomes uneven.
Product prices and availability are accurate as of the date/time indicated and are subject to change. Any price and availability information displayed on Amazon.com at the time of purchase will apply to the purchase of this product.
When a sanding sponge is not enough
A sanding sponge is not the right tool for every trim problem. Peeling or loose paint should be removed safely before sanding. Deep dents, rotten wood, and major profile damage may require repair or replacement rather than more abrasion. For large flat areas, a sanding block or compatible power sander may provide a more even result, but power tools require additional dust control and careful handling near edges.
If the trim is part of an older home and the coating may contain lead, avoid creating dust until you have determined the appropriate safety procedure. Follow product instructions and applicable regulations, or consult a qualified professional.
For most routine trim preparation, a firm medium-grit sponge for leveling and scuffing, plus a fine-grit sponge for finishing, covers the main needs. Choose the shape based on the molding profile and use the lightest pressure that produces a uniform surface.
FAQ
What grit sanding sponge is best for trim?
A medium grit is a useful starting point for smoothing filler and preparing painted trim. Use fine or extra-fine grit for primer and final smoothing, and reserve coarse grit for heavy buildup or rough defects.
Can I use a sanding sponge on painted trim?
Yes. A medium- or fine-grit sponge can dull a glossy finish and smooth minor imperfections before repainting. Avoid removing sound paint unnecessarily, and use appropriate precautions if the coating may contain lead.
Is a sanding sponge better than sandpaper for trim?
A sponge is easier to grip and works well on curved or decorative profiles. Folded sandpaper or a sanding block can offer better control on sharp edges, narrow grooves, and flat surfaces.
How do I keep from rounding trim edges?
Use light pressure, keep the sponge flat on broad faces, and make only brief passes over sharp edges. A firm sponge or small sanding block can provide better control than a soft sponge.
When should I replace a sanding sponge?
Replace it when the abrasive is worn smooth, clogged with paint or filler, torn, or cutting unevenly. A clogged or uneven sponge can make it harder to achieve a consistent finish.