Abrasive leftover from 80 grit showing after stain
Stain often makes coarse sanding scratches, embedded grit, and uneven sanding much more visible. Here is how to identify the problem and repair it without making the finish worse.
Abrasive leftover from 80 grit showing after stain
If 80-grit marks or abrasive residue are visible after staining, the surface was probably not refined enough before the stain was applied. Coarse scratches absorb stain differently from the surrounding wood, so they appear as dark lines, cloudy patches, or cross-grain marks. Loose grit and sanding dust can also stick to the surface, but they are usually easier to correct.
Identify what is showing through
Look closely at the affected area under good light:
Straight lines that follow the sanding direction: These are usually scratches left by 80-grit paper.
Cross-grain swirls or random dark marks: The previous grit may not have removed the 80-grit scratch pattern evenly.
Raised specks or gritty bumps: These may be loose abrasive particles, dust, or debris trapped in the stain.
Dark edges or blotchy patches: These can result from uneven sanding or from stain collecting in deeper scratches.
A rough, fuzzy surface: Wood fibers may have lifted, especially if the surface was dampened or wiped with a wet product before staining.
Stain generally highlights surface variation rather than hiding it. The darker the stain, the more obvious coarse scratches and uneven absorption tend to become.
What to do if the stain is still wet
Do not try to sand through wet stain immediately. Sandpaper can load with pigment, smear the stain, and create a larger uneven area.
Instead:
Remove any obvious loose grit or debris carefully without dragging it across the surface.
Follow the stain manufacturer's instructions for drying time.
Keep dust, moisture, and tools away from the piece while it dries.
Once dry, decide whether the problem is minor enough to blend or requires sanding back.
If the stain is visibly uneven, wiping or adding another coat usually will not remove scratches. It may make the darker areas more pronounced.
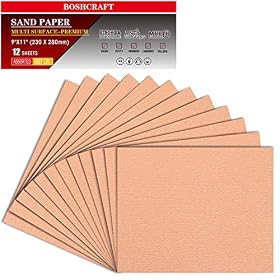
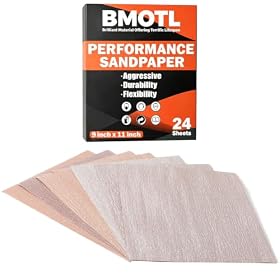
Intermediate sandpaper for removing 80-grit scratches
Product prices and availability are accurate as of the date/time indicated and are subject to change. Any price and availability information displayed on Amazon.com at the time of purchase will apply to the purchase of this product.
Repairing 80-grit scratches after staining
The appropriate repair depends on how deeply the stain has penetrated and whether a clear finish has already been applied.
Minor marks in an otherwise acceptable surface
If the marks are limited and the stain is dry, a light hand-sanding pass may soften them. Use a finer abrasive and sand with the wood grain. Do not concentrate pressure on one small spot, or you may create a light patch that absorbs the next coat differently.
After sanding, remove all dust and test the repair on an inconspicuous area if possible. The sanded section may take stain differently from the surrounding wood.
Deep scratches or widespread abrasive marks
For pronounced 80-grit scratches, the reliable repair is usually to remove the stain from the affected area—or from the entire matching surface—then sand the wood properly before restaining. Spot repairs can be difficult to disguise on tabletops, doors, cabinet faces, and other broad visible panels.
If a clear topcoat has already been applied, strip or sand the finish only as allowed by the product instructions. Avoid sanding aggressively through veneer. Veneer can be damaged quickly, and a qualified refinisher may be the safer choice for valuable or thin-veneered pieces.
Product prices and availability are accurate as of the date/time indicated and are subject to change. Any price and availability information displayed on Amazon.com at the time of purchase will apply to the purchase of this product.
Use a better sanding sequence next time
An 80-grit abrasive is useful for removing material, leveling rough wood, or stripping an old finish. It is usually too coarse to be the final sanding step before stain.
A typical progression for solid wood is:
80 grit: Remove substantial defects, old finish, or uneven areas.
100 or 120 grit: Remove the deeper scratches left by 80 grit.
150 grit: Refine the surface for many staining projects.
180 grit: Use only when appropriate for the wood and stain instructions; sanding too fine can reduce absorption on some surfaces.
The exact stopping point depends on the wood species, stain, and manufacturer's directions. The key rule is to move to the next grit only after the previous scratch pattern is gone. A finer grit cannot efficiently remove every deep 80-grit mark if you skip the intermediate step.
Wipe or vacuum the surface between grits and inspect it under angled light. Do not rely only on touch; some scratches are easy to feel but others show clearly only after the stain is applied.
Product prices and availability are accurate as of the date/time indicated and are subject to change. Any price and availability information displayed on Amazon.com at the time of purchase will apply to the purchase of this product.
Prevent abrasive residue and uneven sanding
Use fresh paper that cuts cleanly instead of worn paper that requires excessive pressure.
Keep the sander flat and avoid tilting its edges into the wood.
Sand with the grain during the final hand-sanding pass.
Replace clogged paper rather than pressing harder.
Use a sanding block for hand sanding so fingers do not create grooves.
Vacuum dust from the surface, joints, and nearby work area before staining.
Use the cleaning method recommended by the stain manufacturer; some tack cloths or oily cleaners can interfere with adhesion or absorption.
Do not mix abrasive grades on the same tool without cleaning or changing the paper.
If you are using a random orbital sander, keep it moving at a steady pace and let the abrasive do the cutting. Holding it in one place can create circular marks or a shallow depression that stain will emphasize.
When to stop repairing and refinish the surface
Refinish the whole visible panel when scratches are widespread, the stain color is uneven, or spot sanding creates obvious light patches. A uniform surface is generally easier to stain consistently than a collection of small repairs.
Consider replacing the abrasive and sanding again when the paper is clogged, torn, contaminated with old finish, or too worn to cut effectively. If the problem is on veneer, a valuable piece, or a surface already covered with several finish layers, get advice from a qualified refinisher before removing more material.
Always follow the stain, finish, and abrasive manufacturer's instructions, and use appropriate eye and respiratory protection when sanding or removing coatings.
FAQ
Can 80-grit sandpaper be used before staining wood?
Yes, but it is normally a starting grit for removing material or an old finish, not the final grit. Follow it with progressively finer grits until the 80-grit scratches are gone.
Why does stain make sanding scratches darker?
Stain collects more heavily in deeper scratches and absorbs differently in unevenly sanded areas. This creates dark lines, swirls, or blotches that may not have been obvious on bare wood.
Can I sand over stain to remove 80-grit marks?
Wait until the stain is dry according to its label. Then test light sanding in an inconspicuous area. Deep or widespread marks may require removing the stain from the affected surface and sanding the wood again.
What grit should I use after 80 grit?
Use an intermediate grit such as 100 or 120 to remove the 80-grit scratch pattern, then continue to a suitable finishing grit such as 150 or 180 when the wood and stain instructions allow it.