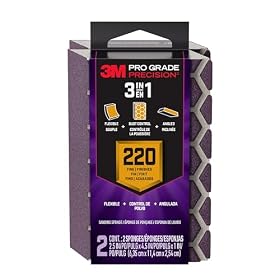
A sanding block paired with 220-grit sheets is a reliable setup for smoothing raised grain and minor imperfections between finish coats without removing too much material.
Use a firm sanding block with 220-grit sandpaper when you need to smooth a finish between coats without leveling aggressively or cutting through to bare wood. The block keeps the abrasive flat, while the relatively fine grit removes dust nibs, light roughness, and minor brush or roller texture.
Why use a sanding block between coats?
Fresh finish can leave small rough spots even when the surface looks smooth from a distance. Light sanding between coats helps the next layer bond mechanically and produces a more even final surface.
A sanding block is useful because it:
Keeps pressure distributed across a flat area
Reduces the chance of sanding grooves with your fingertips
Helps prevent uneven shiny and dull patches
Makes it easier to sand flat panels, trim, shelves, and tabletops consistently
Use light pressure. Between-coat sanding is a surface-preparation step, not an attempt to reshape the wood.
Is 220 grit right for between coats?
In many wood-finishing jobs, 220 grit is a practical starting point for sanding between coats of water-based finish, oil-based finish, paint, or clear coat. It is fine enough for light smoothing but still cuts more effectively than ultra-fine finishing papers.
The correct grit depends on the coating and the surface:
Use 180 to 220 grit for light smoothing when the previous coat feels rough or has visible dust nibs.
Use 220 grit for routine between-coat sanding on a reasonably smooth surface.
Use 320 grit or finer when the finish manufacturer recommends a finer abrasive or when you want very limited cutting before the final coat.
Use a coarser grit only for defects that require it, and then remove the deeper scratches with progressively finer paper.
Always follow the coating manufacturer’s instructions. Some finishes should not be sanded until they have cured enough to produce dry powder rather than soft, gummy residue.
Product prices and availability are accurate as of the date/time indicated and are subject to change. Any price and availability information displayed on Amazon.com at the time of purchase will apply to the purchase of this product.
How to use a sanding block and 220-grit sheets
1. Let the finish dry or cure
Do not sand a soft or tacky coating. A partially cured finish can clog the paper, smear across the surface, or peel from the substrate. Check the product label for sanding and recoating guidance.
2. Cut the sheet to fit the block
Fold a 220-grit sheet around the block or cut it into sections that fit securely. The abrasive should remain flat and should not bunch up under the block.
A paper sheet that is too large can fold over at the edges. A piece that is too small may expose the block and scratch the workpiece.
3. Sand with light, even strokes
Use long strokes in the direction of the grain on wood surfaces. On flat manufactured panels, keep the strokes consistent and avoid pressing harder in the middle or at the edges.
You are looking for a uniformly dull, smooth surface—not visible removal of the finish. Stop when the roughness is gone.
4. Inspect under useful lighting
Wipe or vacuum away dust, then inspect the surface from several angles. A raking light can reveal remaining nibs and uneven areas that are difficult to see under overhead lighting.
Do not assume that sanding until every area looks equally dull is always necessary. On some finishes, excessive sanding can create adhesion or coverage problems by removing too much of the previous coat.
5. Remove dust before recoating
Use the cleaning method recommended for the finish. A vacuum with a suitable brush attachment, a clean lint-free cloth, or a compatible tack cloth may be appropriate depending on the product. Avoid leaving loose abrasive dust on the surface.
Product prices and availability are accurate as of the date/time indicated and are subject to change. Any price and availability information displayed on Amazon.com at the time of purchase will apply to the purchase of this product.
Sanding block formats that make sense
Hand sanding block
A flat hand block is the simplest choice for shelves, doors, trim, and other broad surfaces. Look for a block that holds the sheet firmly and does not flex easily.
Flexible sanding block
A flexible block can follow a slightly curved surface, but it may apply uneven pressure on a flat panel. Use it for contours rather than large, flat areas.
Foam sanding block
A foam block is comfortable for edges and profiles and can be useful when the workpiece is not perfectly flat. Its flexibility also means it can round over sharp edges if you press too hard.
Improvised flat block
A clean, flat backing surface can work for occasional hand sanding, provided it does not have debris, exposed fasteners, or a rough edge that could mark the finish. A purpose-made block is generally easier to control and safer for consistent results.
Product prices and availability are accurate as of the date/time indicated and are subject to change. Any price and availability information displayed on Amazon.com at the time of purchase will apply to the purchase of this product.
When not to use a sanding block
Avoid a rigid block on heavily contoured trim, carved details, or round edges where it cannot make even contact. For those areas, use a fine sanding sponge or folded sheet held with your fingers, applying very light pressure.
Be especially careful at edges. A block can remove finish quickly at a corner and expose bare wood or a different color underneath. Sand up to the edge, then make only a few light passes over it if needed.
Common mistakes between coats
Using too much pressure
Heavy pressure can cut through the coating, flatten intentional texture, or leave visible low spots. Let the abrasive do the work.
Sanding with clogged paper
If the sheet fills with finish or dust, it will sand poorly and may drag debris across the surface. Replace or clean the paper according to its design instead of pressing harder.
Using 220 grit to remove major defects
Deep runs, brush marks, scratches, and ridges may need a more targeted correction. Sanding a large area aggressively with 220 grit can create a low spot or expose substrate. Correct the defect carefully, then refine the surrounding scratches with finer abrasives.
Skipping a test area
Test the grit and pressure in an inconspicuous spot, particularly over stained wood, veneer, paint, or a coating with an unusual sheen. The test can reveal whether the abrasive is too aggressive or whether the finish is ready to sand.
Recoating before dust is removed
Dust left behind can become new texture in the next coat. Clean the work area as well as the workpiece, and avoid creating airborne dust immediately before applying finish.
What to buy for this job
For routine between-coat work, choose a sanding block that stays flat and accepts replaceable abrasive sheets. Buy 220-grit sheets designed for the material you are sanding, and consider keeping a finer grit available if the finish manufacturer calls for it.
A useful setup usually includes:
One firm block for flat surfaces
220-grit sheets for general between-coat smoothing
Replace the block or holder if it no longer keeps the abrasive flat or secure. Replace the sandpaper when it is clogged, torn, rounded at the edges, or no longer cuts evenly. If repeated sanding exposes the substrate, creates waves, or fails to remove defects because the underlying surface is uneven, correcting the surface or recoating may be more appropriate than continuing to sand.
FAQ
Can I use 220-grit sandpaper between coats of polyurethane?
Often, yes, provided the polyurethane is dry or cured enough to sand and the product instructions permit sanding between coats. Use light pressure and stop once the surface is smooth. If the paper gums up, the finish may need more drying time.
Should I use a sanding block or sandpaper by hand?
Use a firm sanding block on flat surfaces because it distributes pressure and helps keep the surface even. Use folded sandpaper or a flexible sanding sponge on profiles, curves, and detailed areas.
Do I need to sand between every coat?
Not always. Follow the finish manufacturer’s instructions. Some products specify sanding between coats, while others allow recoating within a limited window without sanding. Light sanding is generally used when the previous coat has roughness or when the instructions require it.
Can 220 grit sand through a finish?
Yes. Excessive pressure, repeated passes at edges, or sanding a thin coating can expose the material underneath. Use light pressure, inspect often, and be especially cautious on corners and veneer.