Coarse sanding scratches can remain visible through lacquer, polyurethane, shellac, and other thin film finishes. Here’s how to identify the cause, repair the surface, and choose a safer sanding progression.
Grit too coarse under a thin film finish
If sanding scratches are showing through a thin film finish, the finish usually has not hidden the underlying damage—it has made it more visible. Stop adding finish, let the surface dry or cure as directed, then sand the surface smooth with a finer abrasive before recoating. The correct repair depends on whether the scratches are in the wood, in an old finish layer, or between coats.
Why coarse scratches show through
A thin film finish such as lacquer, shellac, varnish, or polyurethane flows into the surface but does not reliably fill deep sanding grooves. Glossy finishes also reflect light across scratches, making them easier to see. Dark stains and finishes can emphasize the problem even more.
Common causes include:
Starting with a grit that is too coarse for the final surface.
Moving to a much finer grit before the coarse scratches have been removed.
Using too much pressure, which can deepen scratches or create uneven sanding.
Continuing to use abrasive after it has become loaded or worn.
Sanding across the grain instead of with it.
Applying a finish before the surface was uniformly smooth.
Using a hard sanding block on a surface that needs a softer, more conforming abrasive.
First determine where the scratches are
Use raking light—a flashlight or work light held at a low angle—to inspect the surface. Look from several directions rather than relying on overhead light.
Scratches visible before finishing
If the marks were present in bare wood, the finish has simply revealed them. You need to sand back far enough to remove the deepest visible scratches, then progress through finer grits without skipping too aggressively.
Scratches visible between finish coats
If the surface was smooth before the first coat but looks scratched after sanding between coats, the abrasive may be too coarse, the pressure too high, or the finish may not have cured enough. Follow the finish maker’s recoat and sanding instructions. A thin, even scuffing pass is usually different from sanding aggressively into the previous coat.
Cloudy or uneven marks rather than straight scratches
Cloudiness can indicate sanding dust, finish that has not cured, contamination, or uneven sheen—not simply coarse grit. Do not keep sanding blindly. Allow the finish to cure as directed and clean the surface according to the product instructions before deciding on the next step.
Product prices and availability are accurate as of the date/time indicated and are subject to change. Any price and availability information displayed on Amazon.com at the time of purchase will apply to the purchase of this product.
How to repair coarse scratches
1. Stop applying finish
Adding more coats rarely fixes deep scratches. It can build a thicker surface that still shows the same defects and makes later repair more difficult.
If the finish is still soft, tacky, or easily marked, wait for the manufacturer’s stated cure time. Sanding too soon can clog the abrasive and smear the finish.
2. Sand with the finest grit that will remove the marks
Start by testing a small, inconspicuous area. If the scratches are deep, a very fine abrasive may polish the surrounding finish without removing the grooves. In that case, step down only as much as needed, then return to finer grits.
A practical progression might be:
Use a medium-fine grit to remove visible coarse scratches.
Move to a finer grit once the previous scratch pattern is uniform.
Finish with the grit recommended for the specific coating and sheen.
For example, a surface marked by a coarse initial sanding may need an intermediate step before a fine finish-sanding grit. Do not assume that jumping directly from a very coarse grit to an ultra-fine grit will save time; the deeper scratches may remain underneath.
The correct final grit varies with the wood, coating, sheen, and application method. Some finishes specify a particular between-coat abrasive or prohibit sanding between certain coats, so the coating instructions take priority.
3. Sand with light pressure and the grain
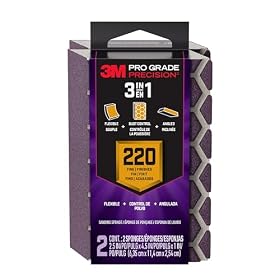
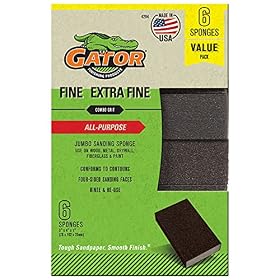
Let the abrasive do the cutting. Excessive pressure can create deeper grooves, flatten edges, and produce uneven sheen. Use a sanding block on broad flat areas, but avoid rounding over corners. On profiled or delicate areas, a sanding sponge may conform better than a rigid block.
For the final passes on wood, sand with the grain. Cross-grain scratches are especially likely to remain visible under a clear film.
4. Remove dust carefully
Vacuum or brush away loose dust, then use the cleaning method allowed by the finish manufacturer. A tack cloth is not appropriate for every coating or surface, and a damp wipe can raise some bare woods. Do not apply another coat until the surface is clean and sufficiently dry.
5. Recoat lightly and evenly
After the surface is smooth and clean, apply the finish according to its instructions. Avoid trying to compensate for scratches with an unusually heavy coat. A thin, even coat is easier to control and less likely to run, sag, or dry unevenly.
Product prices and availability are accurate as of the date/time indicated and are subject to change. Any price and availability information displayed on Amazon.com at the time of purchase will apply to the purchase of this product.
Choosing the right abrasive
Sandpaper sheets
Sheets are useful for hand-sanding broad surfaces, edges, and areas where a random-orbit sander would remove too much material. Choose an abrasive intended for the material and coating you are sanding. Sandpaper made for dry wood preparation may behave differently from abrasive designed for between-coat sanding.
Sanding sponges
Sanding sponges are useful around profiles, edges, and curved areas because they conform to the surface. They are not automatically safer on sharp edges, however; pressure can still cut through a finish or round over a corner.
Sanding blocks
A block keeps pressure more even on flat surfaces. A hard block is helpful for leveling broad areas, while a softer block may be better where slight conformity is needed. Keep the block clean so trapped particles do not create unexpected scratches.
Powered sanders
A powered sander can remove material quickly, but it also increases the risk of sanding through a thin finish, exposing veneer, or creating swirl marks. Use the tool, pad, dust extraction, and abrasive grade recommended for the job. For a small finish defect or between-coat scuffing, hand-sanding is often easier to control.
How to prevent the problem next time
Sand a sample area and inspect it under angled light before finishing the entire piece.
Use fresh abrasive when the paper becomes clogged, glazed, or ineffective.
Do not skip the step needed to remove the previous grit’s scratch pattern.
Use light, consistent pressure.
Keep final sanding with the grain on wood.
Remove all abrasive dust before applying finish.
Follow the coating’s cure time and between-coat sanding instructions.
Test the complete sanding and finishing schedule on scrap or an inconspicuous area, especially on veneer or stained wood.
When sanding is no longer the right repair
If the scratches extend through a veneer, stain, or colored finish, continued sanding may make the defect worse. Stop when you are close to exposing a different color or substrate. A localized repair, stripping and refinishing, or help from a furniture-restoration professional may be more appropriate.
Replace the abrasive when it is loaded or worn. If the finish continues to show scratches despite a controlled grit progression, check the surface preparation, dust removal, coating compatibility, and cure time before buying a different grit. For valuable, veneered, or antique work, conservative hand-sanding and professional advice are safer than aggressive removal.
FAQ
Can a thin polyurethane coat hide coarse sanding scratches?
Usually not. A thin polyurethane film may make scratches more visible, especially under a glossy sheen. Let the coat cure as directed, then sand enough to remove the scratch pattern before recoating.
What grit should I use between coats of finish?
Use the grit and abrasive type specified by the finish manufacturer. Between-coat sanding is normally lighter than bare-wood leveling, and using an abrasive that is too coarse can leave marks in the next coat.
Why do scratches appear after applying clear finish?
Clear finish increases contrast and reflects light across grooves that were difficult to see on bare wood. Scratches may also come from sanding across the grain, worn or contaminated abrasive, or sanding a finish before it has cured.
Should I sand the entire piece or only the scratched area?
Test a small area first. If the scratches are isolated and the finish can be blended, a local repair may work. If the scratch pattern is widespread or the sheen is uneven, sanding the affected surface uniformly usually produces a more consistent result.