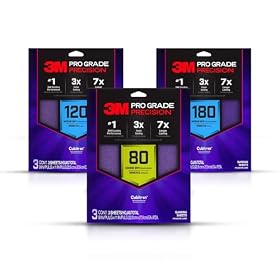
80 versus 120 versus 180 Grit Sandpaper: Which Should You Use?
Use 80 grit for fast material removal, 120 grit for general smoothing, and 180 grit for final preparation and between-coat sanding. The best choice depends on the surface and finish you need.
What do you need help with?
Open an answer, or tell us what we should cover next.
Answered in this guide
Choose the right grit for your sanding job
Start with the least aggressive grit that can solve the surface problem: 80 for heavy removal, 120 for general smoothing, and 180 for final preparation.
Understand what 80, 120, and 180 grit numbers mean
Lower grit numbers use coarser abrasives for faster material removal, while higher numbers create finer scratches for smoother surfaces and finish preparation.
Request a topic and help us choose what to build next.
Buy sanding discs that fit a random-orbit sander
Choose a grit sequence for a specific tabletop project
Fix damage after sanding through veneer
Choose grit for bare wood before stain or clear finishRead this guide →
Requests help us prioritize the next guide. No email required.
One anonymous request per topic.
80 versus 120 versus 180 grit
The quick answer: 80 grit removes material fastest, 120 grit smooths and refines, and 180 grit prepares a surface for paint, stain, or a final finish. For many wood projects, the practical progression is 80 grit only when needed, followed by 120 grit and then 180 grit.
What the grit numbers mean
Grit describes the size of the abrasive particles on the sandpaper. A lower number has larger, more aggressive particles; a higher number has smaller particles and leaves a finer scratch pattern.
This means:
80 grit: Fast cutting and heavy smoothing
120 grit: General-purpose sanding and scratch refinement
180 grit: Fine smoothing and finish preparation
Grit ratings are not perfectly interchangeable between every standard. CAMI and FEPA systems can differ, so compare the stated rating and intended use rather than assuming every brand performs identically.
When to use 80 grit
Choose 80 grit when you need to remove material quickly. It is useful for:
Removing old finish, paint, or varnish
Leveling rough boards or uneven wood
Smoothing pronounced scratches, ridges, or tool marks
Removing minor surface damage before finer sanding
Shaping wood edges and rough profiles
80 grit can leave deep scratches, especially on softwood or veneered surfaces. Avoid starting with it on delicate veneer, thin paint layers, or already-smooth wood unless you need its extra cutting power.
Use light, even pressure. Pressing harder can create uneven grooves, clog the abrasive, and make it harder for the next grit to remove the scratches.
Product prices and availability are accurate as of the date/time indicated and are subject to change. Any price and availability information displayed on Amazon.com at the time of purchase will apply to the purchase of this product.
When to use 120 grit
120 grit is the most useful middle step for many woodworking and refinishing jobs. Use it to:
Sand between some coats of finish when the product instructions allow it
If the surface is already fairly smooth, 120 grit may be the right starting point. Starting with a coarser grit than necessary wastes material and increases the chance of visible scratches.
Product prices and availability are accurate as of the date/time indicated and are subject to change. Any price and availability information displayed on Amazon.com at the time of purchase will apply to the purchase of this product.
When to use 180 grit
180 grit produces a finer scratch pattern and is commonly used for final surface preparation. It works well for:
Final sanding of bare wood before finishing
Removing the remaining 120-grit scratches
Light smoothing between coats of paint, sealer, or finish
Preparing surfaces that must feel smooth without being polished
Refining edges and details after heavier sanding
Do not assume that finer is always better. Over-sanding can burnish or polish some woods, reducing how evenly they absorb stain or finish. Follow the coating manufacturer's preparation instructions, particularly when sanding between coats.
Product prices and availability are accurate as of the date/time indicated and are subject to change. Any price and availability information displayed on Amazon.com at the time of purchase will apply to the purchase of this product.
Which grit should you start with?
Use the least aggressive grit that can solve the surface problem:
Surface condition
Reasonable starting point
Typical next step
Rough wood, heavy finish, or noticeable unevenness
80 grit
120, then 180 if needed
Moderately rough bare wood or 80-grit scratches
120 grit
180 grit
Already smooth wood needing finish preparation
180 grit
Apply the compatible finish
Light between-coat sanding
180 grit or the finish manufacturer's recommendation
Remove dust and recoat
These are starting points, not requirements. Test an inconspicuous area when working on veneer, stained wood, painted surfaces, or an unfamiliar coating.
Product prices and availability are accurate as of the date/time indicated and are subject to change. Any price and availability information displayed on Amazon.com at the time of purchase will apply to the purchase of this product.
Should you use all three grits?
Not always. Use the shortest sequence that removes the previous scratch pattern:
80 → 120 → 180: Best for rough surfaces or heavy finish removal
120 → 180: Suitable for many general wood-sanding jobs
180 only: Suitable for light smoothing or final preparation when the surface is already even
Avoid jumping directly from 80 to 180 when possible. The finer abrasive may take a long time to remove the deeper 80-grit scratches. Conversely, using 80 grit on a surface that only needs light smoothing creates unnecessary work.
Sanding technique affects the result
Regardless of grit, technique matters:
Sand with the grain on visible wood surfaces.
Use even strokes and moderate pressure.
Let the abrasive do the cutting instead of forcing it into the surface.
Remove dust before changing grits.
Inspect under good lighting before moving to the next grit.
Change or clean clogged paper rather than pressing harder.
On flat surfaces, a sanding block helps distribute pressure. A flexible sheet or sanding sponge can conform better to profiles, corners, and trim, but it may be easier to round over sharp edges.
Choosing sheets, discs, or sponges
The grit number is only part of the decision. Choose the format that matches the tool and surface:
Sheets: Useful for hand sanding, sanding blocks, and detail work
Discs: Designed for compatible random orbital or rotary sanders; verify the diameter and hole pattern
Sanding sponges: Useful on edges, contours, and light hand sanding; they may not remove material as quickly as rigid paper
Hook-and-loop abrasives: Convenient for compatible power sanders and easier grit changes
For power sanding, confirm the abrasive's backing and attachment method match your tool. A disc with the wrong size or hole pattern may not fit correctly or collect dust effectively.
Common mistakes
Starting too coarse
Using 80 grit on a nearly smooth surface can create scratches that require several additional steps to remove. Start with 120 or 180 when only light refinement is needed.
Finishing too coarse
Stopping at 80 or 120 may leave visible scratches beneath paint, stain, or clear finish. Use 180 when the coating instructions and surface require a finer preparation.
Skipping dust removal
Loose abrasive dust can interfere with inspection and contaminate paint or finish. Vacuum or wipe according to the coating manufacturer's instructions before applying the next product.
Sanding through veneer
Thin veneer can be removed quickly, especially with 80 grit or a power sander. Use a finer grit, light pressure, and frequent inspections near edges and repaired areas.
Expecting 180 grit to level defects
180 grit is for refinement, not major leveling. Return to 80 or 120 grit when necessary, then work back through the sequence so the deeper scratches are removed.
Bottom line
Choose 80 grit for aggressive removal, 120 grit for general smoothing, and 180 grit for fine preparation or between-coat sanding. For a typical rough-wood project, use 80 only if needed, then move through 120 to 180. For already-smooth wood, begin with 120 or 180 instead of creating extra scratches with a coarse abrasive.
FAQ
Is 120 grit finer than 80 grit?
Yes. 120 grit uses smaller abrasive particles and generally leaves a finer scratch pattern than 80 grit.
Can I go from 80 grit straight to 180 grit?
You can, but it may take longer because 180 grit must remove the deeper scratches left by 80 grit. Using 120 grit in between is usually more efficient.
Is 180 grit good for sanding wood before staining?
180 grit can be appropriate for final preparation, but the ideal grit depends on the wood and stain manufacturer's instructions. Sand evenly and remove all dust before staining.
Can 80 grit sandpaper remove paint?
Yes. 80 grit can remove many paint or finish layers, but it may also scratch the underlying material. Use appropriate dust control and avoid aggressive sanding on thin veneer.
Should I sand between coats of paint with 180 grit?
Often, 180 grit is suitable for light between-coat sanding, but check the paint or finish instructions first. The goal is usually to smooth small imperfections and improve adhesion without cutting through the coating.