Sandpaper usually clogs on paint because the coating is soft, thick, uncured, or poorly matched to the abrasive. Use the right grit, lighter pressure, dust removal, and an open-coat or stearated abrasive to reduce loading.
Sandpaper clogs on paint when softened or uncured coating sticks to the abrasive instead of turning into removable dust. The quickest fixes are to let the paint cure fully, use lighter pressure, choose an open-coat or stearated abrasive rated for painted surfaces, and replace paper as soon as its cutting surface is loaded. If the coating remains gummy, stop sanding and address the paint or temperature before continuing.
Why sandpaper clogs on paint
Common causes include:
The paint has not cured: Paint may feel dry but still be soft underneath. Latex, oil-based, enamel, and thick layers can need much longer to harden than the label’s recoat time.
The surface is too warm: Heat from friction softens paint and makes it smear across the abrasive.
Too much pressure: Pressing hard creates heat and pushes paint into the grit.
The grit is too fine: Fine paper has smaller gaps between abrasive particles, so it fills faster when removing a thick coating.
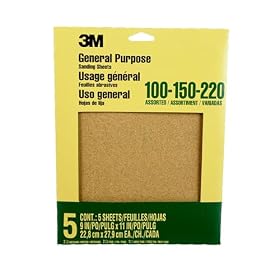
The abrasive is not suited to paint: Some general-purpose sheets load quickly on finishes. Open-coat and stearated abrasives are often better choices for paint removal and finish sanding.
The coating is thick or rubbery: Multiple paint layers, flexible coatings, and some primers can clog almost any conventional paper.
Dust is not being cleared: A loaded surface cannot shed sanding dust effectively, especially when used with a power sander and poor extraction.
What to check first
1. Confirm that the paint is cured
Check the coating label for its drying and curing guidance. Do not rely only on whether the surface feels dry. Press lightly in an inconspicuous spot with a fingernail or a clean, blunt edge. If the finish dents, feels tacky, or produces gummy residue, it is probably not ready for normal sanding.
Move the work to a dry, well-ventilated area within the coating manufacturer’s recommended temperature range. Avoid adding heat with a heat gun unless the paint and substrate instructions specifically allow it; heat can damage the surface or create hazardous fumes.
If the paint is very old, its composition may be uncertain. Paint applied before 1978 can contain lead in the United States. Do not dry-sand suspect lead paint. Follow EPA or local regulations and use a qualified lead-safe professional when appropriate.
2. Reduce pressure and heat
Let the abrasive do the cutting. Use light, even pressure and keep the sander moving. On a power sander, do not press down to make it remove material faster. A loaded sheet or disc will usually get hotter and cut worse, so additional pressure makes the problem worse.
For hand sanding, use long, controlled strokes rather than scrubbing one small area. If the paper or surface becomes warm, stop and let both cool before continuing.
3. Change the abrasive format
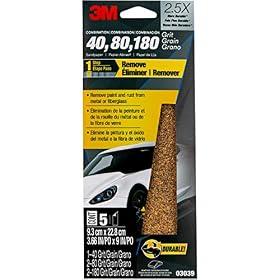
For removing paint, try an open-coat abrasive. Its grain spacing leaves more room for dust and paint particles, which can reduce loading. A stearated or “no-load” abrasive has a coating designed to help prevent finish from sticking to the surface, although it is not immune to clogging on soft or uncured paint.
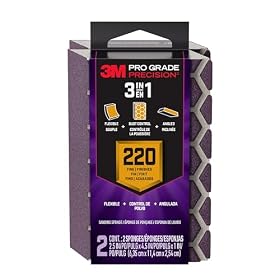
A sanding sponge can work well on edges, profiles, and hand-sanding jobs because it conforms to the surface. For flat areas, sheets or discs provide more consistent contact. Use the abrasive format that matches the tool and backing pad; an incorrectly sized disc or poorly supported sheet can wear unevenly and load faster.
4. Start with a coarser grit when removing paint
If you are trying to remove a thick coating, begin with a grit coarse enough to cut it without excessive pressure. Very fine paper is better for smoothing a cured finish than for stripping several paint layers.
After the coating is removed or leveled, move through progressively finer grits. Skipping too far between grits can leave scratches that require extra sanding. The exact grit sequence depends on the paint, substrate, and final finish, so follow the coating or finish manufacturer’s recommendations when available.
Avoid using coarse paper on soft wood or thin veneer without testing first. It can leave deep scratches, round over edges, or remove more material than intended.
Product prices and availability are accurate as of the date/time indicated and are subject to change. Any price and availability information displayed on Amazon.com at the time of purchase will apply to the purchase of this product.
How to keep sandpaper from loading
Sand only after the paint has cured adequately.
Use open-coat, stearated, or other paint-rated abrasive when appropriate.
Use light pressure and keep the abrasive moving.
Start with a suitable coarser grit for thick, cured paint.
Vacuum dust from the surface and work area regularly.
Use a power sander’s dust collection if the tool, abrasive, and coating allow it.
Replace paper or discs when the grit is visibly filled, glazed, or no longer cuts.
On a hand-sanding block, periodically tap out loose dust outdoors or vacuum the surface rather than rubbing the loaded paper aggressively.
Avoid sanding in excessive heat or humidity, which can slow curing and soften some coatings.
Do not depend on scraping or brushing a clogged abrasive clean if doing so damages the backing or releases hazardous dust. Abrasive cleaners and rubber cleaning sticks may be suitable for some sanding belts or discs, but check the abrasive manufacturer’s instructions first.
Product prices and availability are accurate as of the date/time indicated and are subject to change. Any price and availability information displayed on Amazon.com at the time of purchase will apply to the purchase of this product.
When the paint stays gummy
If every fresh sheet clogs within seconds, the issue may not be the sandpaper. The coating could be uncured, incompatible with the undercoat, excessively thick, contaminated, or naturally soft. Stop sanding and identify the coating before continuing.
For a cured, thick coating, a hand scraper or an approved chemical stripper may reduce the amount of sanding required. Use only methods suitable for the substrate, and follow the product label for ventilation, protective equipment, disposal, and cleanup. Do not mix stripping chemicals or use them near ignition sources.
If the surface is large, the coating is unknown, or dust exposure is a concern, a qualified refinisher or paint professional is the safer next step.
Product prices and availability are accurate as of the date/time indicated and are subject to change. Any price and availability information displayed on Amazon.com at the time of purchase will apply to the purchase of this product.
When to replace the sandpaper or the tool
Replace the abrasive when it is visibly packed with paint, feels smooth instead of gritty, tears, or produces uneven results. Fresh paper is usually more effective than trying to force a clogged sheet to cut.
If new, appropriate abrasive still clogs immediately on fully cured paint, check the sander setup. Confirm that the disc or sheet is correctly attached, the backing pad is flat, and the dust port or vacuum hose is not blocked. Poor dust extraction can contribute to loading, but it will not solve paint that is still soft.
A replacement sander or backing pad is reasonable only when the pad is warped, the tool cannot maintain normal operation, or its dust-collection system is damaged. Disconnect the tool before inspecting it, and have electrical repairs handled by a qualified professional or according to the manufacturer’s service instructions.
FAQ
What type of sandpaper is best for paint?
For many cured-paint jobs, open-coat or stearated “no-load” abrasive is a practical choice because it gives paint and dust more room to clear from the grit. Choose the grit and format based on whether you are removing paint, smoothing it, or preparing for a finish.
Why does sandpaper clog on paint immediately?
The paint is often still soft or uncured, especially when applied thickly or in cool, humid conditions. Excessive pressure, surface heat, a grit that is too fine, and an abrasive not designed for paint can also cause immediate loading.
Can I clean clogged sandpaper?
Lightly loaded abrasive may sometimes be cleared according to the abrasive manufacturer’s instructions, but heavily clogged or glazed paper is usually best replaced. Do not use methods that tear the backing or spread potentially hazardous paint dust.
Should I use coarse or fine sandpaper to remove paint?
Use a suitable coarse or medium grit to level or remove a cured coating, then progress to finer grits for smoothing. Test first on soft wood, veneer, or delicate surfaces because coarse abrasive can cause deep scratches or remove too much material.
Can I sand paint that feels dry?
Not necessarily. Paint can feel dry at the surface while remaining soft underneath. If it dents, feels tacky, or turns gummy during sanding, allow more curing time and follow the coating manufacturer’s instructions.