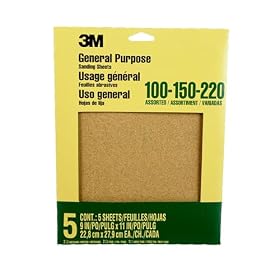
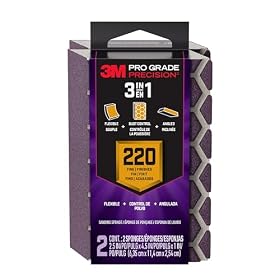
The best grit sequence depends on whether you are flattening raw wood, preparing for finish, or sanding between finish coats. Use the coarsest grit that solves the current problem, then progress through finer grits without skipping too far.
Best grit sequence for a tabletop
The best grit sequence for a tabletop depends on its condition and the finish you plan to apply. For most unfinished wood, start around 80 or 100 grit only when you need to remove damage or flatten the surface, then progress through 120, 150, and 180 grit. For a clean, freshly milled tabletop, starting at 120 or 150 grit helps avoid unnecessary scratches.
Do not automatically sand to the finest possible grit. A surface polished too smooth may absorb stain unevenly or provide less mechanical grip for some finishes. Follow the finish manufacturer’s preparation instructions when they specify a final grit.
Recommended grit sequences by tabletop condition
Rough, uneven, or heavily scratched wood
Use this sequence when the tabletop has milling marks, deep scratches, glue residue, or noticeable unevenness:
80 → 120 → 150 → 180 grit
Start with 80 grit only if the surface genuinely needs aggressive material removal. Keep the sander moving and check your progress often. Once the major defects are gone, move to the next grit rather than continuing to wear down the surface with coarse paper.
If the tabletop is substantially uneven, sanding may not be the best first step. A hand plane, cabinet scraper, or professional flattening service may remove high spots more evenly than prolonged coarse sanding.
Moderately smooth raw wood
For a tabletop that is already fairly flat and smooth:
120 → 150 → 180 grit
This is a practical general-purpose sequence for many hardwood and softwood projects. Use 120 grit to remove visible machining marks, 150 grit to refine the scratches, and 180 grit as a common stopping point before stain, dye, or clear finish.
Clean, well-prepared wood
If the surface is already flat and has only light handling marks:
150 → 180 grit
You may be able to begin at 180 grit for final preparation, but inspect the surface under good lighting first. Fine paper will not efficiently remove deep scratches; it can instead make them harder to see until finish is applied.
Preparing for paint
For raw wood that will be painted, a typical sequence is:
120 → 150 or 180 grit
The primer usually covers minor sanding marks, so extremely fine sanding is not always useful before priming. After the primer dries, lightly sand with 220 grit or a fine sanding sponge to remove raised fibers, dust nibs, and roughness. Remove the dust before applying paint.
Preparing for stain
A common stain-preparation sequence is:
120 → 150 → 180 grit
Some woods and stains call for a different final grit. Sanding too finely can reduce stain absorption and create a lighter or uneven appearance, especially on porous wood. Always make a test sample using the same wood, sanding sequence, and finish.
Sanding between finish coats
Between-coat sanding is different from bare-wood sanding. The goal is usually to knock down dust nibs and slight roughness, not to remove the finish.
Use 320 grit or finer, depending on the finish instructions and how rough the surface is. Fine sanding sponges or between-coat paper can be easier to control than aggressive power-sanding discs. Apply light pressure and stop as soon as the surface feels uniformly smooth.
Do not sand between coats until the finish has dried or cured as directed. If the paper gums up, the finish may not be ready, or the abrasive may be too coarse.
How to use each grit effectively
Sand with the grain when sanding by hand
Hand-sand with the wood grain, especially during the final pass. Cross-grain scratches can remain visible beneath clear finish or stain.
Use a sanding block on flat areas
A flat sanding block helps keep pressure even and reduces the chance of creating shallow dips. A flexible sanding sponge is useful around eased edges and profiles, where a rigid block may flatten the shape.
Clean the surface between grits
Vacuum or brush away abrasive dust before changing grits. Remaining coarse particles can create fresh scratches that the next grit must remove. Wipe the surface according to the finish manufacturer’s instructions; avoid leaving moisture on wood that has not had time to dry.
Inspect under angled light
Run your hand over the tabletop and shine a light across the surface at a low angle. Scratches running across the grain are often easier to see this way. If they remain, return to the grit that should remove them instead of jumping directly to a much finer paper.
When to stop sanding
For many bare-wood tabletops, 180 grit is a sensible final grit before finishing. Some projects stop at 150 grit for better stain penetration, while others use 220 grit when the finish instructions call for it or when a particularly smooth surface is desired.
The correct stopping point is the finest grit that suits the finish—not necessarily the finest grit available. Over-sanding can waste time, reduce stain absorption, and make it harder to maintain a consistent surface.
A simple default sequence
When you need a starting point for a typical unfinished tabletop, use:
120 grit → 150 grit → 180 grit
Add 80 grit before 120 only when the tabletop has substantial defects. Add 220 grit after 180 only when the finish system calls for it or you want additional refinement before a suitable finish. For between-coat sanding, switch to a fine abrasive and use light pressure rather than repeating the bare-wood sequence.