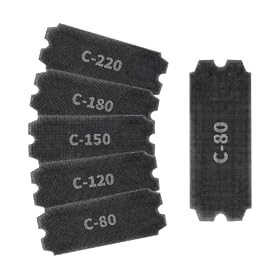
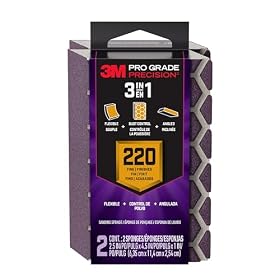
An 80/120/180/220 grit sandpaper pack covers most basic wood preparation, paint, repair, and refinishing jobs. Here is what each grit does and how to use the set without skipping too far between grits.
An 80, 120, 180, and 220 grit sandpaper sheet pack is a practical starting set for common woodworking, furniture refinishing, and paint-preparation jobs. The lower grits remove material and finish; the higher grits smooth scratches and prepare surfaces for paint, stain, or a final clear coat.
The key is using each grit for the right job. Start with 80 grit only when the surface needs substantial correction, move to 120 or 180 for general smoothing, and use 220 for final preparation or light sanding between coats.
What each sandpaper grit is for
80 grit: fast material removal
80 grit is the most aggressive option in this starter set. Use it to:
Remove thick, failing finish or paint
Smooth substantial scratches, ridges, or uneven wood
Level rough edges and damaged areas
Shape wood before switching to finer grits
It leaves visible scratches, so it normally should not be the final grit on a finished surface. On soft wood, use light pressure and check frequently because coarse abrasive can remove material quickly.
120 grit: general-purpose smoothing
120 grit is useful after 80 grit and for many surfaces that are already reasonably flat. It can:
Refine scratches left by coarse sanding
Smooth rough sawn or previously sanded wood
Prepare bare wood for many paint and finish systems
Remove minor surface imperfections
For a small repair or a surface that needs only moderate smoothing, 120 grit may be an appropriate starting point. If the surface is already smooth, beginning with 80 grit can create unnecessary scratches.
180 grit: finish preparation
180 grit bridges the gap between general smoothing and final sanding. It is commonly useful for:
Refining 120-grit scratches
Smoothing wood before stain or clear finish
Preparing previously painted surfaces for another coat
Blending repaired areas into surrounding surfaces
Whether 180 grit is suitable as the final grit depends on the material and the coating instructions. Some finishes benefit from a slightly more open surface, while others call for finer sanding.
220 grit: fine sanding and between-coat work
220 grit is the finest sheet in this pack. Use it for:
Final smoothing before many paint or finish applications
Light sanding between dried finish coats
Removing small raised fibers or minor roughness
Scuffing a sound, glossy surface so a new coating can adhere
Use a light touch with 220 grit. The goal is usually to smooth or dull the surface, not to remove a deep layer of material.
How to use the four-grit progression
A typical wood-preparation sequence is:
80 grit, if the surface is rough, damaged, or covered with stubborn finish
120 grit to remove the deeper scratches from 80 grit
180 grit to refine the surface
220 grit for final smoothing when the coating or project calls for it
You do not always need every grit. If 120 grit removes the defects without leaving deep scratches, you may move to 180 grit. Likewise, 220 grit may be unnecessary for a rough construction project that will be covered with an opaque coating.
Do not move to the next grit until the previous grit has removed the scratches or defects you were addressing. Finer paper can make the surface feel smooth while leaving deeper scratches underneath.
Product prices and availability are accurate as of the date/time indicated and are subject to change. Any price and availability information displayed on Amazon.com at the time of purchase will apply to the purchase of this product.
What to look for in a starter sheet pack
Abrasive material
Aluminum oxide is a common general-purpose abrasive for wood and many painted surfaces. Silicon carbide paper is often associated with finer finishing or wet sanding, depending on the product. Check the package before buying if you need a particular abrasive type.
Backing and flexibility
Paper-backed sheets are easy to fold, cut, or wrap around a sanding block. A flexible sheet can conform to curves, while a stiffer backing may be easier to keep flat on broad surfaces.
For hand sanding, choose sheets that can be used with a sanding block if you want flatter, more even results. Bare fingers concentrate pressure and can create grooves or uneven spots.
Dry or wet use
Most general-purpose sheets are intended for dry sanding, but some are made for wet sanding. Do not assume a sheet is suitable for water or other liquids. Follow the package directions, especially when sanding painted surfaces or finishes.
Full sheets versus pre-cut pieces
Full sheets are versatile and can be folded or cut into smaller pieces. Pre-cut sheets may be more convenient, but check that their dimensions fit your sanding block or hand sander. If you plan to use a power sander, confirm the required sheet size and hole pattern before buying.
Grit labeling
Look for clearly labeled grit numbers and a consistent grit scale. Packs that include 80, 120, 180, and 220 grits provide useful coverage, but the number of sheets in each grit matters if one stage of your work will consume more abrasive than another.
Product prices and availability are accurate as of the date/time indicated and are subject to change. Any price and availability information displayed on Amazon.com at the time of purchase will apply to the purchase of this product.
When this pack is a good choice
This four-grit set is a good general starting point for:
Small furniture repairs
Bare-wood preparation
Removing or dulling old finishes
Smoothing painted wood before recoating
Hand-sanding trim, shelves, doors, and craft projects
Light refinishing and touch-up work
It is less suitable as a complete solution for specialized jobs such as automotive wet sanding, drywall sanding, masonry work, or aggressive floor refinishing. Those applications may require different abrasive materials, backing, formats, or grit ranges.
Product prices and availability are accurate as of the date/time indicated and are subject to change. Any price and availability information displayed on Amazon.com at the time of purchase will apply to the purchase of this product.
How much sandpaper do you need?
The right quantity depends on the surface, coating, wood species, sanding method, and whether the paper loads with dust or finish. Coarse grits may wear quickly when removing paint or old finish. Fine grits may last longer on a clean, lightly prepared surface but can still become ineffective when clogged.
A useful practice is to buy enough 120 and 180 grit for the main work, while keeping 80 and 220 grit for specific stages. For a single small project, a mixed pack is usually more flexible than buying a large quantity of one grit.
Tips for better results
Sand with the grain when working on wood, especially during the final passes.
Use a sanding block on flat surfaces to distribute pressure evenly.
Start with the least aggressive grit that can solve the problem.
Replace paper when it stops cutting, becomes clogged, or leaves inconsistent scratches.
Vacuum or wipe away dust before changing grits.
Inspect the surface under good light rather than relying only on touch.
Let paint or finish dry fully before sanding between coats.
Avoid pressing hard; excessive pressure can clog the abrasive and create uneven results.
When sanding an existing painted or finished surface, follow the coating manufacturer's directions. If the coating may contain lead or another hazardous substance, stop and use appropriate testing, containment, ventilation, and protective procedures before disturbing it.
Bottom line
An 80/120/180/220 sheet assortment covers the most common stages of basic sanding: correction, smoothing, refinement, and final preparation. For the most versatile starter setup, choose clearly labeled sheets that match your sanding method, add a sanding block for flat work, and use only the grits the surface actually needs.
FAQ
Is 80/120/180/220 grit enough for most wood projects?
It is enough for many basic preparation, repair, painting, and refinishing jobs. Specialized work may need coarser grit for heavy removal, finer grit for polishing or delicate finishes, or a different abrasive type.
Can I skip from 80 grit directly to 220 grit?
Usually, no. The jump can leave deep 80-grit scratches that take a long time to remove with 220 grit. Use 120 and possibly 180 grit between them, inspecting the surface after each stage.
Should I use 220 grit before staining wood?
Often, 180 or 220 grit is used for final smoothing, but the correct stopping point depends on the wood and stain or finish instructions. Sanding too finely can affect how some products absorb.
Do I need a sanding block with these sheets?
A sanding block is useful for flat surfaces because it spreads pressure more evenly than bare fingers. Flexible hand sanding may still be preferable around curves, profiles, or edges.
How do I know when to replace a sheet?
Replace it when it stops removing material, becomes clogged with dust or finish, tears, or produces uneven scratches. Pressing harder usually does not restore worn abrasive and can worsen the result.