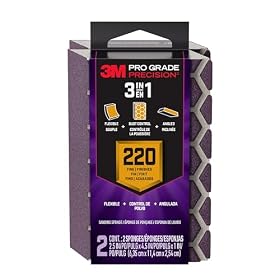
The best sanding sponge for painted stair spindles is flexible enough to follow rounded profiles but firm enough to level drips and rough patches. For most repainting jobs, start with a medium-grit sponge and finish with a fine-grit option.
For painted stair spindles, choose a flexible sanding sponge with a medium-to-fine abrasive, ideally in a shape that can reach both the rounded front and narrow sides of each spindle. A medium grit around 120 to 150 is useful for dulling glossy paint and smoothing minor roughness; a fine grit around 180 to 220 is better for final preparation before the next coat.
The goal is usually to create a clean, lightly abraded surface—not to remove every layer of paint. Sand gently, control the dust, and use a sanding sponge that can bend around curves without digging grooves into the trim.
What to look for in a sanding sponge
Flexible but not overly soft
A sponge that flexes slightly can follow turned, rounded, or tapered spindles more evenly than a rigid sanding block. However, an extremely soft sponge may conform to defects instead of leveling them. Look for a medium-density sponge that compresses around curves but still provides controlled pressure.
A narrow or contoured shape
Stair spindles often have tight transitions, grooves, and narrow edges. A rectangular sponge can work on broad sections, but a narrow sponge or contoured edge is more useful around details. Some sanding sponges have different abrasive surfaces or beveled edges, which can help reach the sides without catching on adjacent spindles.
Medium and fine grits
A practical grit choice depends on the condition of the existing paint:
80 to 100 grit: For heavier defects, stubborn drips, or localized buildup. Use cautiously because coarse abrasive can leave scratches that show through paint.
120 to 150 grit: A good starting range for dulling a sound glossy finish and smoothing ordinary surface irregularities.
180 to 220 grit: For final smoothing after repairs or after the surface has been leveled with a coarser grit.
Above 220 grit: Usually unnecessary for ordinary painted trim unless the coating or product instructions call for a finer finish.
If the paint is already smooth and firmly attached, begin with 150 or 180 grit rather than jumping straight to a coarse abrasive.
Washable construction
Paint dust and residue can quickly load an abrasive. A washable sanding sponge can be rinsed when the manufacturer permits it, then dried completely before reuse. This does not restore worn abrasive, but it can remove loose dust and extend the useful life of the sponge.
The best sanding approach for painted spindles
1. Clean the spindles first
Remove dirt, hand oils, polish, and grease before sanding. Cleaning first prevents the abrasive from spreading grime across the finish and helps reveal chips, drips, and loose paint.
Let the surface dry fully. Follow the cleaner and paint manufacturer's safety instructions, and avoid mixing cleaning chemicals.
2. Check the existing coating
Look for peeling paint, cracks, soft areas, and thick ridges. Lightly sand only sound paint. Loose coating should be removed or stabilized according to the requirements of the new primer or paint.
If the home was built before 1978 or the existing paint may contain lead, do not dry-sand casually. Lead-paint work requires appropriate containment, dust control, and safe work practices; consult current EPA guidance or a qualified professional.
3. Start with light pressure
Wrap the sponge around the spindle and make controlled passes along its length where possible. Avoid aggressive back-and-forth scrubbing in one small area, which can create flat spots or visible scratches.
For grooves and turned sections, use the edge or corner of the sponge rather than forcing a flat face into the detail. Sand enough to remove gloss and smooth imperfections, then stop.
4. Use a finer sponge before painting
After leveling the surface, switch to a finer grit to reduce visible scratch marks. Wipe away dust with a clean, slightly damp lint-free cloth if compatible with the coating and allow the surface to dry.
Apply primer where the existing coating has been exposed, repairs have been made, or the new paint system requires it. Always follow the primer and paint label instructions for surface preparation and recoat timing.
Flexible medium-grit sanding sponge for initial paint preparation
Product prices and availability are accurate as of the date/time indicated and are subject to change. Any price and availability information displayed on Amazon.com at the time of purchase will apply to the purchase of this product.
Sponge versus sandpaper sheets
A sanding sponge is generally easier to control on rounded stair spindles because it distributes pressure over a flexible surface. It is also less likely than a folded sheet to create sharp pressure points.
Traditional sandpaper sheets still have advantages. They can be folded into very narrow sections, wrapped around small profiles, or cut into custom shapes. A sheet may be preferable for flat areas such as stair risers, baseboards, or the square ends of spindles.
For a spindle-heavy project, a sanding sponge is usually the more convenient primary tool, with folded fine-grit paper reserved for tight details.
Product prices and availability are accurate as of the date/time indicated and are subject to change. Any price and availability information displayed on Amazon.com at the time of purchase will apply to the purchase of this product.
Common mistakes to avoid
Using coarse grit everywhere: Coarse scratches can remain visible beneath a new coat.
Sanding through sound paint unnecessarily: Exposed substrate may need spot priming and can create an uneven appearance.
Ignoring the edges: Paint buildup often remains where spindles meet the rail or tread. Use the sponge edge carefully rather than forcing it into the joint.
Applying too much pressure: Let the abrasive do the work; excessive force can flatten rounded profiles.
Painting over dust: Dust can cause poor adhesion and a rough finish. Vacuum or wipe the surface according to the coating manufacturer's instructions.
Using a loaded abrasive: Replace the sponge when the abrasive is worn, clogged, or no longer cutting evenly.
Narrow or contoured sanding sponge for spindle details
Product prices and availability are accurate as of the date/time indicated and are subject to change. Any price and availability information displayed on Amazon.com at the time of purchase will apply to the purchase of this product.
When to replace the sponge or use another tool
Replace the sanding sponge when its abrasive feels smooth, it tears, or it leaves inconsistent results. A worn sponge can make preparation slower and may encourage excessive pressure.
Use a different tool when the job involves major paint removal, extensive peeling, thick drips, or deep repairs. A scraper, chemical coating remover, or more controlled power-sanding method may be appropriate, but these options require extra care around dust, nearby finished surfaces, and potentially hazardous older coatings. For uncertain paint conditions or extensive restoration, consult a qualified professional.
Product prices and availability are accurate as of the date/time indicated and are subject to change. Any price and availability information displayed on Amazon.com at the time of purchase will apply to the purchase of this product.
FAQ
What grit sanding sponge is best for painted stair spindles?
For most repainting preparation, start with 120 to 150 grit to dull the finish and smooth minor defects. Use 180 to 220 grit for final smoothing. Use 80 to 100 grit only for localized heavy buildup or rough areas, and sand carefully to avoid deep scratches.
Can I use a sanding sponge on glossy painted spindles?
Yes. A medium-grit sanding sponge can scuff a sound glossy surface so primer or paint can bond more reliably. Clean the spindles first, use light pressure, and avoid sanding through the coating unnecessarily.
Are sanding sponges better than sandpaper for stair spindles?
Sanding sponges are often easier to control on rounded and turned spindles because they flex and distribute pressure. Folded sandpaper can still be useful for very narrow grooves, sharp transitions, and flat adjacent surfaces.
How do I sand stair spindles without making flat spots?
Use a flexible, medium-density sponge, keep pressure light, and make controlled passes that follow the spindle's length and profile. Avoid scrubbing one small area with a rigid block or excessive force.
Do I need to remove all the old paint before repainting stair spindles?
Usually not if the existing paint is firmly attached and compatible with the new coating. Clean it, dull the gloss, smooth defects, and spot-prime exposed areas as needed. Remove or address loose, peeling, or unstable paint before applying a new finish.