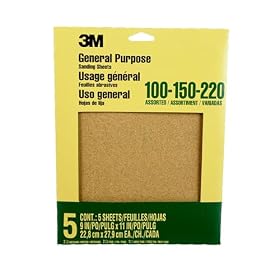
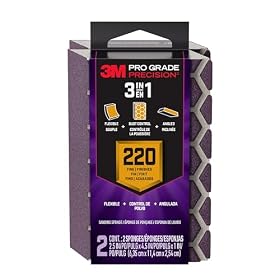
The best sandpaper for paint depends on whether you are stripping old coating, smoothing imperfections, or preparing a surface between coats. Use coarse grits for removal, medium grits for leveling, and fine grits for a smooth finish.
What do you need help with?
Open an answer, or tell us what we should cover next.
Answered in this guide
Choose the right sandpaper for painting
Use coarse grits to remove loose or thick paint, medium grits to smooth edges and repairs, and fine grits to prepare surfaces for a smooth finish.
Aluminum oxide is a practical general-purpose choice for painted surfaces, while the abrasive type, backing, and non-clogging coating affect durability and sanding performance.
Use sheets for flexible hand sanding, sponges for contoured areas, discs with compatible power sanders, and blocks when you need a flatter sanding surface.
Request a topic and help us choose what to build next.
Test old paint for lead before sanding
Buy 5-inch discs that fit a random-orbit sander
Remove thick paint with a chemical or heat method
Estimate how much sandpaper a paint project needs
Requests help us prioritize the next guide. No email required.
One anonymous request per topic.
Best sandpaper for paint
The best sandpaper for paint depends on the job. Use coarse sandpaper to remove loose or thick paint, medium grits to smooth edges and surface flaws, and fine grits to prepare a painted surface for another coat. For most household painting projects, a progression from 80 or 100 grit to 120 or 150 grit, followed by 180 to 220 grit when a smoother finish is needed, covers the main tasks.
Quick grit guide for paint
Job
Useful starting grit
Typical finishing grit
Remove peeling or loose paint
60–80
100–120
Smooth paint edges after scraping
100–150
180–220
Prepare glossy paint for repainting
120–180
180–220
Smooth wood before painting
100–150
180–220
Sand primer between coats
220–320
320 or finer when needed
Smooth minor imperfections in a finish
220–320
400 for delicate final work
The exact grit depends on the coating, the condition of the surface, and whether you are sanding by hand or with a power tool. Start with the least aggressive grit that will do the job; coarse paper removes material quickly but can leave scratches that show through paint.
What to look for in sandpaper for paint
Abrasive type
Aluminum oxide is a practical general-purpose abrasive for wood, painted surfaces, and many repair jobs. Silicon carbide paper is often used for fine finishing and wet sanding because it can produce a smooth scratch pattern. Ceramic abrasives are useful for demanding material removal, but they may be unnecessary for light hand sanding.
For ordinary paint preparation, the grit and backing format usually matter more than choosing a specialized abrasive.
Backing material
Paper-backed sheets are inexpensive and easy to cut for hand sanding. Cloth-backed paper is more durable and flexible, which can help when sanding edges or using a sanding block. Film-backed abrasives tend to provide a consistent surface and resist tearing, but they can cost more.
Coated versus non-clogging paper
Paint, primer, and wood dust can quickly fill the abrasive surface. Look for paper described as open-coat, stearated, or non-clogging when sanding painted wood or softwood. These treatments can extend the useful life of the sheet, although no sandpaper stays clog-free indefinitely.
If the paper becomes shiny, stops cutting, or begins smearing paint instead of producing dust, replace it rather than pressing harder.
Product prices and availability are accurate as of the date/time indicated and are subject to change. Any price and availability information displayed on Amazon.com at the time of purchase will apply to the purchase of this product.
Best sandpaper by paint-preparation job
Removing peeling or thick paint
Begin by scraping away paint that is already loose. Sanding should smooth the remaining edges rather than do all the removal work.
Use roughly 60 to 80 grit for stubborn ridges, thick paint, or pronounced transitions. Follow with 100 to 120 grit to reduce the deeper scratches. Do not keep using coarse paper after the high spots are gone; it can remove too much wood or create grooves that require extra filling and primer.
For large areas, a random orbital sander can save time, but keep it moving and use light pressure. A power sander can cut through paint and wood quickly, especially near corners and edges.
Preparing glossy paint for a new coat
You usually do not need to strip sound paint before repainting. Clean the surface first, repair damage, and dull the gloss so the new coating can bond properly.
Use about 120 to 180 grit for initial scuffing, then inspect the surface. If it is uniformly dull and free of loose coating, further sanding may not be necessary. On trim or furniture where a smoother finish matters, finish with 180 to 220 grit.
Sanding alone may not solve adhesion problems caused by grease, wax, silicone, or incompatible coatings. Clean the surface according to the paint manufacturer's instructions and use the recommended primer when necessary.
Smoothing paint edges and repairs
After scraping or filling a damaged area, use 120 to 150 grit to level the repair. Then switch to 180 or 220 grit to blend the edge into the surrounding paint.
Sand beyond the visible edge of the repair using lighter pressure. This creates a gradual transition that is less likely to show through the new paint. Wipe away dust before priming.
Sanding wood before painting
For bare wood, begin with 100 or 120 grit if the surface is rough, then move to 150 or 180 grit. Use 220 grit for a smoother final surface when the paint system calls for it.
Sanding too finely can burnish some wood surfaces and reduce how readily primer absorbs or bonds. Follow the coating manufacturer's recommendations, particularly with water-based primers and finishes.
Sanding primer between coats
Use fine paper, commonly 220 to 320 grit, to remove dust nibs and minor roughness from cured primer. Sand lightly; the goal is to smooth the surface, not remove the primer.
Some primers should not be sanded until they have fully cured. Check the product label for drying and recoat guidance. If you sand through to bare wood, spot-prime those areas before applying finish paint.
Product prices and availability are accurate as of the date/time indicated and are subject to change. Any price and availability information displayed on Amazon.com at the time of purchase will apply to the purchase of this product.
Choosing the right sandpaper format
Sandpaper sheets
Sheets are the most flexible option for hand sanding. They can be folded, cut into smaller pieces, or wrapped around a sanding block. A sanding block helps keep the abrasive flat and reduces the chance of creating finger-shaped depressions.
Use a sheet by hand for corners, narrow trim, profiles, and small repairs where a power sander would be difficult to control.
Sanding sponges
Sanding sponges conform to rounded edges and trim profiles better than a rigid block. They are convenient for light scuffing and between-coat sanding, but they may not remove thick paint as quickly as a firm abrasive sheet or power-sanding disc.
Choose a fine or medium sanding sponge for paint preparation and a coarser one for leveling rough areas. Avoid rounding sharp corners by applying even pressure.
Sanding discs
Discs are designed for compatible sanders, such as random orbital sanders. They are efficient for doors, tabletops, cabinets, and other broad surfaces.
Match the disc diameter, attachment style, and hole pattern to the tool. Start with a moderate grit rather than the coarsest available, and use dust collection when possible. Do not use a disc on a tool unless the disc and tool are compatible and the tool's instructions allow that application.
Sanding blocks
A rigid or semi-rigid block keeps pressure distributed across a flat area. It is especially useful for smoothing paint edges and filler because it helps prevent an uneven, wavy surface.
For small jobs, a dedicated sanding block can be more controllable than holding loose paper in your hand.
Product prices and availability are accurate as of the date/time indicated and are subject to change. Any price and availability information displayed on Amazon.com at the time of purchase will apply to the purchase of this product.
How to sand painted surfaces without damaging them
Identify the coating and surface. Determine whether you are sanding wood, drywall, metal, or an existing painted finish.
Clean the area. Remove grease, wax, dirt, and loose debris before sanding.
Scrape loose paint first. Do not rely on sandpaper to remove unstable coating.
Start with a moderate grit. Move coarser only if the surface is not changing efficiently.
Use light, even pressure. Let the abrasive do the cutting.
Sand with the surface in mind. On wood, finish with the grain when hand sanding. On broad flat areas, use a block or compatible sander.
Change paper when it clogs. Pressing harder can damage the substrate and does not restore a loaded abrasive.
Remove dust before painting. Vacuum and wipe according to the coating manufacturer's directions.
Inspect under good light. Look for remaining gloss, scratches, ridges, and exposed areas before priming or painting.
When to wet sand paint
Wet sanding is mainly a fine-finishing technique. It can reduce dust and help smooth cured paint or clear finishes, but it is not usually the fastest way to remove ordinary wall or trim paint.
Use wet sanding only when the paint or finish manufacturer permits it. Protect nearby electrical equipment and surfaces from water, and allow the substrate to dry completely before recoating. For routine wall preparation, dry sanding with appropriate dust control is usually simpler.
Paint-sanding safety
If a building or painted object may contain lead-based paint, do not dry-sand casually. Older homes and previously painted surfaces can create hazardous dust. Follow current EPA or local requirements, use appropriate containment and respiratory protection, and consider a qualified lead-safe professional.
For ordinary paint, wear eye protection and a properly selected dust mask or respirator. Improve ventilation, use a vacuum or sander with dust collection when appropriate, and follow the safety instructions for the coating and sanding tool. Stop if you uncover an unknown coating, unusual dust, or a potentially hazardous material.
When to replace the sandpaper—or stop sanding
Replace the sheet, sponge, or disc when it is clogged, torn, smooth, or no longer cutting effectively. If the surface remains glossy after reasonable scuffing, check for wax, grease, or a coating that requires a specific primer rather than simply using a coarser grit.
A replacement sander or sanding accessory may be reasonable when the current tool cannot accept the correct format, has poor dust control, or is leaving uneven marks. If the paint is widespread, unstable, contaminated, or potentially lead-based, professional preparation may be safer than aggressive sanding.
Bottom line
For most paint projects, choose non-clogging aluminum oxide sandpaper in several grits rather than relying on one sheet. Use 80 to 120 grit for removal and leveling, 120 to 220 grit for repaint preparation and edge blending, and 220 to 320 grit for light primer or between-coat sanding. Sheets and blocks provide control for small areas, sanding sponges work well on profiles, and compatible discs are efficient on broad flat surfaces.
FAQ
What grit sandpaper is best for removing paint?
Use about 60 to 80 grit for stubborn or thick paint after scraping away loose coating. Follow with 100 to 120 grit to smooth the scratches and transition before priming.
What grit should I use to sand paint before repainting?
For sound but glossy paint, 120 to 180 grit usually provides useful scuffing. Finish with 180 to 220 grit when you need a smoother surface or are painting trim and furniture.
Can I use 220-grit sandpaper on paint?
Yes. 220 grit is useful for final smoothing, light scuffing, and sanding cured primer between coats. It is usually too fine for quickly removing thick or peeling paint.
Is a sanding sponge better than sandpaper for paint?
A sanding sponge is useful on rounded edges, trim profiles, and light scuffing. Flat sheets used with a sanding block generally provide better control on broad flat surfaces and repair edges.
Should I sand all the paint off before repainting?
No. Sound paint usually only needs cleaning, repair, and enough sanding to remove gloss and smooth imperfections. Remove or stabilize peeling, cracked, or poorly bonded coating before applying new paint.