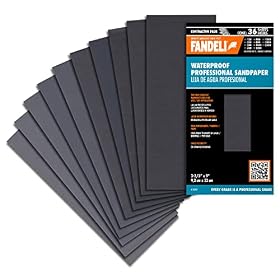
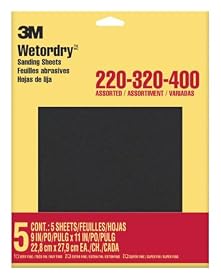
Waterproof wet-and-dry sandpaper is the right choice for smoothing a cured finish with water or another compatible lubricant. Here is how to choose the abrasive, grit sequence, and sheet format without cutting through the finish.
Waterproof paper for wet-sanding a finish should be labeled waterproof, wet-and-dry, or wet sanding paper. Look for a flexible sheet with a waterproof backing and an abrasive intended to stay sharp when used with water. Silicon carbide is a common choice for fine wet sanding, while the best grit depends on whether you are leveling dust nibs, removing orange peel, or preparing for polishing.
What to look for when buying
Waterproof backing
Ordinary dry sandpaper can soften, curl, or delaminate when soaked. Waterproof paper is made to resist water and hold its shape during wet use. A flexible paper backing is useful for broad, flat surfaces; a slightly stiffer sheet may be easier to control when leveling a small defect.
Do not assume that paper labeled “fine” or “automotive” is waterproof. Confirm that the package specifically permits wet sanding.
Silicon carbide abrasive
Silicon carbide is commonly used for fine wet sanding because it cuts cleanly and is available in very fine grits. Aluminum oxide wet-and-dry paper can also be suitable, but the product instructions should specifically support wet use and the finish you are sanding.
The abrasive should be evenly distributed and firmly bonded to the sheet. If the paper sheds abrasive quickly, clogs despite adequate lubrication, or leaves random deep scratches, replace it rather than continuing with a damaged sheet.
Useful sheet sizes
Full sheets are economical for large flat panels and can be cut into smaller pieces. Half-sheet or quarter-sheet pieces are easier to hold and reduce waste on small projects. Choose a size that lets you keep a flat sanding face without folding the abrasive into a sharp edge.
For contoured trim or rounded edges, a flexible sheet wrapped around a soft sanding pad is generally easier to control than a bare folded sheet.
Choosing the right grit
Use the least aggressive grit that will accomplish the job. A coarse abrasive removes defects faster but creates deeper scratches and increases the chance of sanding through the finish.
600–800 grit: Initial leveling of minor texture, dust nibs, or a slightly uneven cured finish. Use light pressure and check frequently.
1,000–1,500 grit: Refining scratches after leveling and preparing many finishes for a smoother sheen or later polishing.
2,000–3,000 grit: Very fine finishing work before polishing or when a highly smooth surface is required.
Above 3,000 grit: Specialized ultra-fine finishing and polishing preparation; it is usually unnecessary for routine furniture refinishing.
These ranges are starting points rather than universal rules. A soft finish, thin clear coat, veneer, or sharp edge may require starting finer. If you can feel a defect with your fingertip, begin with a conservative grit and make a few light passes before deciding whether more cutting is necessary.
Product prices and availability are accurate as of the date/time indicated and are subject to change. Any price and availability information displayed on Amazon.com at the time of purchase will apply to the purchase of this product.
How to wet-sand a finish safely
Confirm that the finish is cured. Dry to the touch does not necessarily mean ready for wet sanding. Follow the finish manufacturer's cure instructions. Water can interfere with some coatings or enter exposed wood.
Clean the surface. Remove dust and grit that could create deep scratches.
Use clean water and a compatible lubricant. A small amount of a suitable sanding lubricant can help the paper glide and reduce loading. Follow the finish and abrasive manufacturer's directions; do not use an unknown chemical on a delicate coating.
Soak or dampen the paper as directed. Some waterproof sheets can be used immediately, while others benefit from brief wetting. Avoid long soaking if the manufacturer does not recommend it.
Sand lightly and evenly. Keep the abrasive moving. A small soft pad helps distribute pressure on broad surfaces.
Wipe the slurry away often. The slurry shows where material is being removed, but it can also hide defects. Rinse the surface and inspect it under good lighting.
Change direction between grits. Lightly sanding in a different direction makes it easier to see when the previous grit’s scratches have been removed.
Stop before edges and corners are damaged. Edges have less finish thickness and are easy to burn through. Sand them separately with very light pressure, or mask them during broad-surface work.
Dry and inspect before continuing. Do not judge the final appearance while the surface is covered with water.
For electrical tools, keep water away from the tool, power cord, switches, and outlets. Hand sanding is usually the simpler option for wet work. Use eye protection, follow the coating's safety data, and provide ventilation when the finish or lubricant calls for it.
Product prices and availability are accurate as of the date/time indicated and are subject to change. Any price and availability information displayed on Amazon.com at the time of purchase will apply to the purchase of this product.
When wet sanding is the wrong choice
Wet sanding is not appropriate for every coating or substrate. Avoid it when:
The finish is not fully cured.
The substrate is bare wood, veneer, MDF, or another material that could swell or stain from water.
The coating manufacturer prohibits water or recommends dry sanding only.
The finish is so thin that leveling could expose the layer underneath.
You are sanding near unsealed joints, openings, or edges where water could migrate.
For these situations, use the finish manufacturer's recommended dry abrasive and dust-control method instead.
Product prices and availability are accurate as of the date/time indicated and are subject to change. Any price and availability information displayed on Amazon.com at the time of purchase will apply to the purchase of this product.
Buying advice by job
Smoothing dust nibs or small imperfections
Choose waterproof paper in the 1,000–1,500 grit range, or start finer if the finish is thin. A small piece on a soft pad gives better control than a large folded sheet.
Leveling a clear coat before polishing
A progression such as 1,000 or 1,500 grit followed by 2,000 grit or finer may be appropriate if the coating is thick enough and fully cured. Do not skip inspection between grits; remaining coarse scratches will show after polishing.
Removing noticeable orange peel or texture
A coarser starting grit may be needed, but this is the highest-risk use because it removes more finish. Use a flat pad, keep away from edges, and stop as soon as the high spots are leveled. If the finish is thin or valuable, professional refinishing may be safer.
Refinishing furniture
For furniture, water compatibility matters as much as grit. Confirm the coating type and cure time first. On a finish over wood, keep water exposure controlled and dry the surface promptly. A dry-sanding method may be preferable when the wood or finish is moisture-sensitive.
Common purchasing mistakes
Buying regular dry sandpaper instead of waterproof wet-and-dry sheets.
Starting with an unnecessarily coarse grit.
Choosing a very fine assortment without a grit that can remove the existing defect.
Using a folded sheet directly on a flat panel and creating uneven pressure.
Reusing a contaminated piece after it has picked up coarse particles.
Assuming “waterproof” means the finish itself can safely be exposed to water.
An assortment can be convenient if you are unsure which grit will work, but a matched sequence is more useful than a random collection of grits. For a single small repair, buy enough of the selected grit to replace sheets as soon as they become loaded or damaged.
FAQ
What grit waterproof paper should I use for wet sanding a clear coat?
For minor defects, start around 1,000 to 1,500 grit and move to 2,000 grit or finer as needed. Use a coarser grit only when the finish is thick enough to safely level more pronounced texture.
Can I use regular sandpaper for wet sanding?
No. Regular dry sandpaper may soften, curl, or separate when wet. Use paper specifically labeled waterproof, wet-and-dry, or suitable for wet sanding.
Should I soak waterproof sandpaper before using it?
Follow the abrasive manufacturer's instructions. Some sheets can be used damp immediately, while others benefit from brief soaking. Do not assume extended soaking is harmless.
Can I wet-sand a finish on bare wood?
Usually not without a specific reason and compatible materials. Water can raise the grain, stain the wood, or enter joints and edges. Confirm the finish and substrate manufacturer's recommendations first.
When should I replace wet-sanding paper?
Replace it when the abrasive is loaded, the sheet no longer cuts evenly, the backing begins to soften or curl, or the paper has picked up a coarse contaminant that could scratch the finish.