The best paper for removing polyurethane is usually a coarse aluminum oxide or ceramic abrasive, starting around 60 to 80 grit for a thick cured finish and moving to finer grits as the coating comes off. The right choice depends on whether you are stripping a flat surface, detail work, or a small repair.
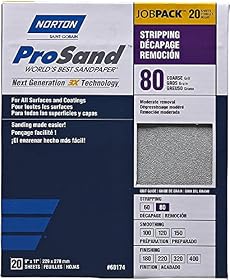
Removing polyurethane usually calls for coarse sandpaper first, followed by progressively finer grits. For a thick or fully cured finish, start with 60 or 80 grit. Once most of the coating is gone, switch to 100 or 120 grit, then use 150 to 180 grit to prepare the wood for a new finish.
For most wood projects, aluminum oxide paper is a practical general-purpose choice. Ceramic abrasive paper or discs can cut more aggressively and last longer on tough finishes, while sanding sponges and flexible sheets work better around profiles and edges.
Best sandpaper grits for removing polyurethane
60 to 80 grit: remove thick polyurethane
Use 60- or 80-grit abrasive when the polyurethane is thick, heavily built up, peeling, or difficult to cut. This range removes finish quickly, but it can also leave deep scratches or flatten edges if you apply too much pressure.
Use a sanding block or powered sander on broad, flat areas. Keep the tool moving and check your progress frequently so you do not cut deeply into the wood.
100 to 120 grit: remove remaining finish
After the surface is mostly free of polyurethane, move to 100 or 120 grit. This helps remove the coarse scratches and any thin patches of finish left behind.
Do not move to a finer grit while shiny polyurethane remains in random areas. New finish may adhere unevenly if old coating is still present.
150 to 180 grit: prepare for refinishing
Use 150- or 180-grit paper after the old coating has been removed and the surface is uniformly dull. This is commonly appropriate for preparing wood before applying stain, paint, or another clear finish, but follow the new finish manufacturer's instructions.
Going much finer before staining can reduce how readily some woods absorb stain. For that reason, the smoothest possible surface is not always the best surface for the next coating.
Which type of sandpaper works best?
Aluminum oxide paper
Aluminum oxide is a versatile choice for hand sanding and many general wood projects. It is widely available in sheets, discs, and sanding belts, and it works well for removing polyurethane when used with the correct grit sequence.
Choose it when you want an affordable, adaptable abrasive for a typical refinishing job.
Ceramic abrasive
Ceramic abrasives are useful when the finish is especially hard or you are using a power sander for a larger area. They generally cut aggressively, so use light pressure and avoid lingering on edges, corners, and veneer.
Ceramic paper or discs can be a good choice when ordinary abrasive loads up quickly or removes material too slowly.
Garnet paper
Garnet paper can produce a smooth result on wood, but it is usually better suited to finish sanding than rapid removal of a thick polyurethane layer. It may wear faster during aggressive stripping.
Sanding sponges
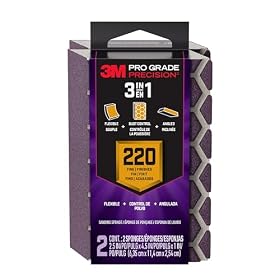
Sanding sponges are useful for molding, rounded edges, chair parts, and other areas where a rigid sheet or disc cannot conform well. They are usually not the fastest option for stripping a large flat surface.
Use a medium or coarse sponge for removal, then switch to a finer sponge for smoothing. A sponge is also helpful for reducing the risk of sharp paper digging into profiles.
Product prices and availability are accurate as of the date/time indicated and are subject to change. Any price and availability information displayed on Amazon.com at the time of purchase will apply to the purchase of this product.
Choose the format based on the surface
Sanding discs for large flat areas
Random-orbit sanding discs are efficient for tabletops, cabinet sides, doors, and other broad surfaces. Use a coarse disc to remove the finish, then change to finer discs rather than trying to do the entire job with one abrasive.
A dust-extraction setup can improve visibility and reduce airborne dust, but it does not eliminate the need for suitable respiratory and eye protection.
Sandpaper sheets for hand sanding
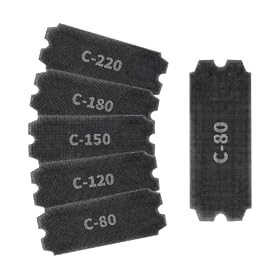
Sheets are useful for edges, corners, small repairs, and areas where a power sander could remove too much material. Wrap the paper around a sanding block for flat surfaces instead of sanding with loose fingers, which can create uneven depressions.
Folded paper can work for detail areas, but replace it when the abrasive surface becomes smooth, clogged, or torn.
Sanding sponges for profiles and details
Use sponges around trim, rounded edges, turned legs, and carved surfaces. They conform better than rigid blocks, but they can still round over sharp edges if you use excessive pressure.
Product prices and availability are accurate as of the date/time indicated and are subject to change. Any price and availability information displayed on Amazon.com at the time of purchase will apply to the purchase of this product.
How to remove polyurethane without damaging the wood
Clean the surface. Remove dirt, wax, and loose debris before sanding. Contamination can clog the abrasive.
Test a small hidden area. Confirm how thick the finish is and how aggressively the wood responds.
Start with the least aggressive grit that works. Try 80 grit for a substantial cured finish; use a finer starting grit if the coating is already thin or damaged.
Sand with the grain when working by hand. On flat areas, keep a sanding block level. With a random-orbit sander, avoid tilting the tool or holding it in one place.
Inspect under good lighting. Shiny spots usually indicate remaining polyurethane. Dull spots may be bare wood, but confirm before progressing.
Step up gradually. Move from coarse to medium to finishing grit. Skipping too many stages can leave scratches that the next grit cannot easily remove.
Remove dust between grits. Use a vacuum or a suitable dust-removal method recommended for the project. Avoid simply grinding accumulated dust into the surface.
Product prices and availability are accurate as of the date/time indicated and are subject to change. Any price and availability information displayed on Amazon.com at the time of purchase will apply to the purchase of this product.
When sanding is not the best removal method
Sanding works well for a thin or moderately thick polyurethane layer, but it may be inefficient for multiple heavy coats. It can also generate substantial dust and may damage veneer, thin wood, sharp edges, or delicate details.
For a heavy buildup, a compatible chemical stripper followed by careful scraping and light sanding may be more practical. Follow the stripper label, provide the required ventilation, wear the specified protective equipment, and dispose of residue as directed. Never mix stripping chemicals, and do not assume a product is safe for every wood, veneer, or existing coating.
Heat guns can damage wood or create a fire risk and are not appropriate for every finish. Use them only if the tool and coating instructions specifically support that method.
Product prices and availability are accurate as of the date/time indicated and are subject to change. Any price and availability information displayed on Amazon.com at the time of purchase will apply to the purchase of this product.
Common problems while sanding polyurethane
The sandpaper clogs quickly
Polyurethane can soften from friction, especially if the finish is not fully cured or the sander is pressed too hard. Reduce pressure, let the abrasive cut at its own rate, and replace loaded paper. Abrasives marketed for coatings or with anti-clog features may last longer, but they still need regular replacement.
The paper is not cutting
The grit may be too fine, the abrasive may be worn, or the coating may be unusually thick. Try fresh 60- or 80-grit abrasive on a small test area. If progress remains poor across a large buildup, consider a suitable chemical stripping method instead of continuing to generate dust.
Deep scratches remain in the wood
You may have started too coarse, applied too much pressure, or stayed too long in one spot. Continue with the next appropriate grit only after the finish is removed, and sand evenly over the surrounding area. Deep scratches may require additional medium-grit sanding before finishing.
Edges are becoming rounded
Power sanders and flexible paper can remove material quickly at edges. Use a sanding block, reduce pressure, and hand-sand near corners. Veneer requires particular care because sanding through its thin surface may permanently expose the substrate.
What to buy for a polyurethane-removal project
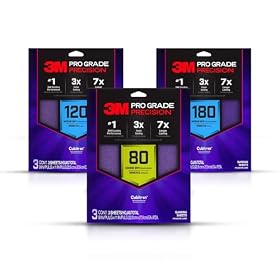
For a typical flat wood surface, choose a progression such as 80, 120, and 150 or 180 grit, in a format that matches your tool. Add sanding sponges for profiles and hand-sanding sheets for edges and corners. If the finish is unusually hard or thick, ceramic abrasive can be worth considering; otherwise, aluminum oxide is a sensible starting point.
Buy extra abrasive rather than trying to stretch one sheet or disc past the point where it cuts effectively. Fresh paper generally gives you better control and reduces the temptation to apply excessive pressure.
Wear eye protection and appropriate respiratory protection for the dust involved, keep the work area ventilated, and follow the sander, abrasive, and finish manufacturers' instructions. If the coating may contain lead or another hazardous substance, stop and use the applicable professional testing and removal guidance before sanding.
FAQ
What grit sandpaper removes polyurethane fastest?
For a thick, cured polyurethane finish, 60 or 80 grit is usually a practical starting range. Use light pressure and check often because coarse abrasive can scratch the wood or damage veneer.
Can I remove polyurethane with 120-grit sandpaper?
Yes, 120 grit can remove a thin finish or clean up residue after coarse sanding. It is usually slower than 60 or 80 grit on multiple thick coats.
Should I sand with or against the grain?
Hand-sand with the wood grain. When using a random-orbit sander, keep the tool flat, moving, and under control; finish with a grain-direction hand-sanding pass when appropriate.
Is sanding or chemical stripping better for polyurethane?
Sanding is convenient for thin or moderate coatings and small areas. Chemical stripping may be more efficient for heavy buildup, delicate details, or surfaces where aggressive sanding could damage veneer, but it requires careful adherence to the product's safety instructions.