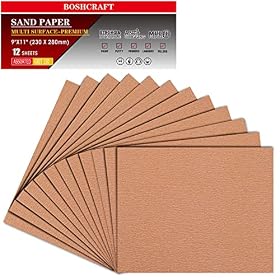
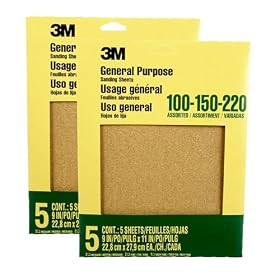
For most oak projects, finish with 150-grit sandpaper before staining. Use 120 grit first when the surface needs more leveling, then progress to 150 without skipping grits. Choose finer paper only when the stain manufacturer specifically recommends it or the wood is unusually smooth.
Oak usually takes stain well, but the wrong sandpaper can leave visible scratches or make the color look uneven. For most solid-oak furniture, cabinets, and trim, use 120-grit paper to level the surface if needed, then finish with 150-grit sandpaper. If the oak is already smooth and undamaged, start with 150 grit. Avoid sanding much finer than 180 grit unless the stain instructions call for it, because overly polished wood may absorb less stain and produce a lighter or less consistent color.
Best sandpaper grit for oak before stain
150 grit: the best general-purpose finish
150-grit aluminum oxide sandpaper is a reliable final grit for most oak before applying stain. It removes the scratches left by coarser paper while leaving enough texture for the stain to penetrate evenly.
Sand with the grain and use light, even pressure. The surface should look consistently dull, with no shiny patches or visible cross-grain scratches.
120 grit: useful for leveling and removing defects
Start with 120 grit when the oak has planer marks, shallow dents, uneven areas, or scratches from a coarser abrasive. Follow it with 150 grit before staining.
Do not jump directly from very coarse paper to 150 grit if deep scratches remain. A gradual progression, such as 80, 120, then 150 grit, makes it easier to remove scratches without spending excessive time on the final pass.
180 grit: appropriate in some cases
180 grit can be useful as a light final pass on smooth oak, especially for small projects or when the stain manufacturer recommends it. It is not automatically better than 150 grit. Sanding too fine can close the surface and reduce stain absorption, particularly with some penetrating stains.
Follow the stain label rather than assuming that the finest available paper is the best choice.
Grits to avoid as the final step
Avoid stopping at coarse paper such as 40, 60, or 80 grit. Those abrasives can leave scratches that become much more noticeable after stain is applied. Also avoid using 220 grit as the default final grit unless the product instructions specifically call for it. It may make the oak absorb stain less evenly.
Which type of sandpaper works best?
Aluminum oxide paper
Aluminum oxide is the practical all-around choice for oak. It is widely available in sheets, discs, and sanding belts, and it generally maintains a useful cutting edge as it wears. Choose it for hand sanding or random-orbit sanding.
Garnet paper
Garnet paper can provide a smooth hand-sanded finish, but it typically wears faster than aluminum oxide. It can be a good choice for a small finishing job where you want close control, but it is less economical for large surfaces.
Silicon carbide paper
Silicon carbide paper is commonly associated with very fine finishing and wet sanding. It is usually unnecessary for ordinary dry sanding before wood stain. Do not wet-sand unfinished wood unless the finish system specifically requires it.
Product prices and availability are accurate as of the date/time indicated and are subject to change. Any price and availability information displayed on Amazon.com at the time of purchase will apply to the purchase of this product.
Choose the right format for the job
The best format depends on the surface and how much material you need to remove.
Random-orbit sanding discs: Fast and efficient for tabletops, cabinet panels, and broad flat surfaces. Use a compatible disc and keep the sander moving.
Sandpaper sheets: Better for edges, profiles, corners, and hand-sanding between power-sander passes. Fold the sheet or use it with a sanding block.
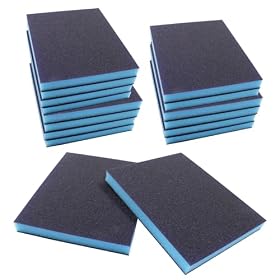
Sanding sponges: Useful on molded trim, edges, and lightly contoured surfaces. They are less aggressive than a rigid block on flat areas.
Sanding blocks: Help keep pressure even and reduce the chance of creating shallow finger grooves.
For flat oak, a power sander can save time, but the final pass should still follow the grain. Hand-sand difficult edges and end areas carefully because they can absorb stain differently from the broad face of the board.
Product prices and availability are accurate as of the date/time indicated and are subject to change. Any price and availability information displayed on Amazon.com at the time of purchase will apply to the purchase of this product.
How to sand oak before staining
Inspect the surface. Remove dust, glue spots, labels, and finish residue. Sanding alone may not remove hardened glue or deep defects.
Start with the least aggressive grit that solves the problem. Use 120 grit for ordinary leveling, or begin coarser only when deep scratches or mill marks require it.
Progress through the grits. If you start with 80 grit, follow with 120 and then 150. If the surface is already fairly smooth, 150 may be enough.
Sand with the grain. Cross-grain scratches can remain visible after staining.
Ease sharp edges lightly. A few gentle passes can prevent an edge from looking much darker than the surrounding face. Do not heavily round over edges unless that is part of the design.
Remove all sanding dust. Vacuum the surface and then wipe it with a clean, dry, lint-free cloth. Avoid leaving residue that could interfere with the stain.
Check under good lighting. Look across the surface at a low angle. Shiny spots may indicate uneven sanding or remaining finish.
Test the complete process. Use an offcut or hidden area to check the final grit, conditioner or washcoat, stain color, and number of coats.
Product prices and availability are accurate as of the date/time indicated and are subject to change. Any price and availability information displayed on Amazon.com at the time of purchase will apply to the purchase of this product.
Should you use a sanding sealer or wood conditioner?
Oak is generally more uniform than pine, but it can still show color variation between grain areas, end grain, sapwood, and different boards. A pre-stain conditioner, washcoat, or sanding sealer may change how deeply the stain penetrates and can make the final color lighter.
Use one only when it is compatible with the stain and the desired appearance. Always test it on scrap oak first. A conditioner cannot correct scratches left by poor sanding, and it may not be necessary for every oak project.
Product prices and availability are accurate as of the date/time indicated and are subject to change. Any price and availability information displayed on Amazon.com at the time of purchase will apply to the purchase of this product.
Special considerations for oak veneer
Oak veneer can be sanded, but it has a much thinner wear layer than solid wood. Use 150 or 180 grit by hand or with very light pressure, and avoid aggressive power sanding near edges. Do not keep sanding to remove a stubborn dark spot if the veneer may be close to wearing through.
If the veneer is already smooth and free of defects, a light scuffing pass may be all it needs. When the surface has a damaged finish, confirm whether the material is veneer before choosing a coarse grit.
Common problems before staining
Scratches appear after staining
The stain has made scratches more visible. Sand back with the next appropriate grit, following the grain, and remove all dust before applying another coat. Deep scratches may require returning to a coarser grit and progressing through the sequence again.
The color looks uneven
Possible causes include uneven sanding, glue residue, end grain, mixed wood species, or different absorption between boards. Check a sample using the same sanding and preparation steps. A compatible conditioner or washcoat may help, but it can also change the color.
Some areas will not accept stain
Shiny or pale areas may still contain finish, glue, wax, or burnishing from excessive pressure or a dull abrasive. Remove the contaminant if possible, then sand evenly with fresh paper. If the problem is on veneer, avoid removing more material than necessary.
The oak looks too light after sanding
Very fine sanding or a sealer can reduce stain absorption. Confirm the final grit and preparation method against the stain instructions. Do not simply apply a much darker stain without first testing it, because that can make the color uneven or muddy.
Bottom line
For most oak before staining, choose 150-grit aluminum oxide sandpaper as the final abrasive. Use 120 grit first when the surface needs leveling, then finish with 150. Use 180 grit only for a light finishing pass when appropriate, and avoid defaulting to very fine paper. Sand with the grain, remove every trace of dust, and test the full process on scrap before staining the visible workpiece.
FAQ
Is 120 or 150 grit better for oak before staining?
Use 150 grit as the usual final grit. Start with 120 grit when the oak has planer marks, shallow defects, or scratches that need leveling, then sand again with 150 grit.
Can I use 220-grit sandpaper on oak before stain?
You can, but it is not the best default. Sanding to 220 grit may reduce stain absorption and create a lighter or less even color. Follow the stain manufacturer's instructions and test the result on scrap wood.
Should oak be sanded with the grain before staining?
Yes. Sanding with the grain helps prevent cross-grain scratches that become more visible after stain is applied.
What sandpaper is safest for oak veneer?
Use 150- or 180-grit paper with light pressure, preferably by hand near edges. Oak veneer can be thin, so avoid aggressive sanding and stop as soon as the surface is uniformly prepared.
Do I need wood conditioner on oak?
Not always. Oak is usually more consistent than softwoods, but a compatible conditioner or washcoat may help with variation between boards or grain areas. Test it first because it can change the stain color and absorption.