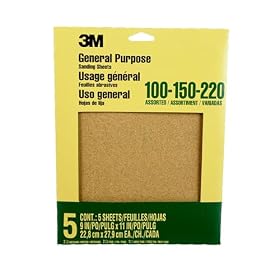
Sandpaper usually tears in a 1/4 sheet sander because it is loose, incorrectly positioned, clogged with dust, or catching on a damaged platen. Check the paper fit and clamps first, then inspect the pad, dust collection, and sanding technique.
What do you need help with?
Open an answer, or tell us what we should cover next.
Answered in this guide
Stop sandpaper from tearing in a 1/4-sheet sander
Unplug the sander, then check the sheet fit, clamps, sanding pad, dust holes, paper type, airflow, pressure, and workpiece for anything that could loosen, heat, wrinkle, or catch the paper.
Use a quarter sheet that reaches both clamps without excess material, keep it flat on the pad, and tighten the retention system so neither end slips or bunches during sanding.
Check whether loose clamps are causing torn sheets
Inspect both paper clamps or the retention system for weak tension, damage, or slipping. A loose end can bunch the sheet beneath the pad and tear it during use.
Check the pad and dust holes for causes of tearing
Clean dust from the sanding pad and holes, then look for a worn, damaged, uneven, or distorted pad. These problems can increase friction, reduce support, and damage the paper.
Use backing and abrasive intended for a power sander, keep dust moving through the collection system, and guide the tool with light, even pressure instead of forcing it into the workpiece.
Request a topic and help us choose what to build next.
Replace a damaged or worn sanding pad
Remove paint or pitch that quickly clogs sandpaper
Choose a grit that will not leave visible scratches
Keep a sheet sander from rounding crisp edges
Requests help us prioritize the next guide. No email required.
One anonymous request per topic.
Sheet tearing in a 1/4 sheet sander
If sandpaper keeps tearing in a 1/4 sheet sander, the most common causes are a poor fit, loose or uneven clamps, a damaged sanding pad, excessive pressure, or heat from clogged abrasive. Stop the sander, unplug it, and work through the checks below before installing another sheet.
1. Check the paper size and position
A quarter-sheet sander needs paper that sits flat and is held securely at both ends. Paper that is too large can wrinkle or catch on the workpiece; paper that is too small may not reach the clamps properly.
Check that:
The sheet is cut square and folded cleanly if you are dividing a full sheet.
The edges do not extend beyond the sanding pad.
The paper is centered from side to side.
The paper lies flat without bubbles, creases, or slack.
The abrasive side faces the workpiece.
Do not leave a loose flap hanging from the pad. It can catch on an edge and tear quickly.
2. Inspect the clamps or paper-retention system
Loose clamps are a frequent reason for torn sheets. If one end slips, the paper can bunch up under the pad and rip. Open the clamps, reseat the sheet, and make sure the paper is inserted as far as the tool’s instructions specify.
Look for:
A clamp that does not close fully
Paper pulled out of one side
A torn edge trapped under the clamp
Dust preventing the clamp from gripping
A spring or retention piece that appears bent or damaged
If the paper repeatedly slips from the same end, compare the two clamps. A damaged retention mechanism may need a replacement part or service rather than a different sandpaper brand.
Product prices and availability are accurate as of the date/time indicated and are subject to change. Any price and availability information displayed on Amazon.com at the time of purchase will apply to the purchase of this product.
3. Clean the sanding pad and dust holes
Dust between the paper and pad can create high spots. Those spots make the abrasive flex and tear, especially when the sander is pressed down.
With the tool unplugged, remove the paper and brush or vacuum dust from the pad. Clear the pad’s dust-extraction holes without enlarging or damaging them. If the backing pad is covered with packed residue, clean it according to the manufacturer’s instructions.
Also check the paper’s dust holes. A sheet designed for a different hole pattern may not extract dust effectively, allowing heat and debris to build up under the abrasive.
Product prices and availability are accurate as of the date/time indicated and are subject to change. Any price and availability information displayed on Amazon.com at the time of purchase will apply to the purchase of this product.
4. Inspect the pad for damage or wear
A worn, warped, cracked, or softened pad can make sandpaper tear even when it is installed correctly. Run your fingers lightly over the unplugged pad and look for raised edges, deep grooves, missing material, or areas that no longer feel flat.
Replace the pad if it is visibly damaged or no longer holds paper evenly. Use a replacement specified for the sander. Do not try to compensate for a deformed pad by tightening the paper excessively or applying more downward pressure.
5. Use the right paper backing and abrasive
Some sandpaper is made for hand sanding and may not tolerate the movement, heat, or clamping action of a power sander. Choose sheets labeled or otherwise specified for power-sanding use, and match the sheet format to the tool’s retention system.
Very coarse paper can catch more aggressively on rough surfaces. Very fine paper can load with dust quickly when used on paint, filler, resin, or softwood. A loaded sheet generates heat and may become brittle or tear at the edges.
Replace the sheet when it is clogged, glazed, worn, or no longer cutting efficiently. Continuing to use a loaded sheet often increases pressure and makes tearing more likely.
6. Check dust collection and airflow
Poor dust removal can cause abrasive loading, heat, and paper failure. Inspect the dust port, hose, adapter, and collection container or bag for blockages. Make sure the hose is not kinked and that the connection fits securely.
If the sander uses a filter or collection bag, clean or replace it as directed. A full container or heavily loaded filter can reduce airflow. Do not operate a dust extractor or sander without the filter or collection components required by the manufacturer.
Fine dust from paint, filler, and some finishes can present additional respiratory and fire risks. Use the protective equipment and dust-control method recommended for the material and tool. For coatings of unknown age, especially old paint, follow applicable lead-safety guidance rather than dry-sanding casually.
7. Reduce pressure and let the sander move
A 1/4 sheet sander should generally be guided with light, even pressure. Excess force can flatten the pad, increase friction, generate heat, and cause the paper to tear around its edges or holes.
Keep the sander moving in a controlled pattern. Avoid holding it stationary, rocking it onto one corner, or pushing the front edge into the workpiece. Let the abrasive do the cutting and keep the base as flat as possible.
If the sheet tears only when sanding an edge, ease the tool onto the surface instead of driving the edge of the pad into it. For narrow edges or profiles, hand-sanding with a sanding block may be safer and more controllable.
8. Look for catches in the workpiece
A protruding nail, screw, staple, splinter, dried finish ridge, or sharp corner can snag the paper. Inspect the surface before sanding and remove or flatten anything that can catch the abrasive.
When sanding across a joint or damaged area, begin with light pressure and keep the tool moving. If the paper tears at one repeatable spot, inspect that location rather than assuming the sander is defective.
9. Check for overheating or a tool fault
If paper tears after only a short time and the pad or housing becomes unusually hot, stop using the sander. Confirm that the pad is flat, the paper is not clogged, and the dust path is clear.
A burning smell, abnormal noise, erratic motion, damaged cord, sparking, or a motor that runs inconsistently indicates a possible electrical or mechanical fault. Unplug the tool and follow the manufacturer’s service instructions. Do not open or repair the electrical parts unless you are qualified to do so.
A quick repair sequence
Unplug the sander.
Remove the torn sheet and clear dust from the pad, clamps, holes, hose, and collection system.
Inspect the pad and clamps for damage.
Install a correctly sized sheet made for power sanding.
Confirm that both ends are tight and the paper is flat.
Test on scrap with light pressure and continuous movement.
Stop if the sheet slips, tears, overheats, or the tool behaves abnormally.
If a new, correctly fitted sheet still tears in the same place, replace the damaged pad or retention part if available. If the tool has a warped base, persistent vibration, overheating, or an electrical problem, replacing the sander may be more reasonable than repeatedly buying paper or attempting an uncertain repair.
FAQ
Why does sandpaper tear at the corners of a 1/4 sheet sander?
The paper may be loose, extending past the pad, folded unevenly, or catching on an edge. A damaged or worn pad can also create a raised corner that tears the sheet. Reseat the paper, check the clamps, and inspect the pad with the tool unplugged.
Can I use regular sandpaper in a 1/4 sheet sander?
Use paper suitable for power sanding and compatible with the sander’s clamps and dust-hole layout. Hand-sanding paper may have a backing or fit that does not hold up well under machine sanding.
Why does my sandpaper tear after a few minutes instead of immediately?
Delayed tearing is often caused by abrasive loading, poor dust extraction, excessive pressure, or heat. Clean the dust path, use lighter pressure, keep the sander moving, and replace clogged paper.
Should I replace the sanding pad if paper keeps tearing?
Replace the pad when it is warped, cracked, badly worn, soft, or no longer holds paper evenly. If a good-fitting sheet continues to tear after the pad and retention system are checked, have the tool serviced or consider replacing it.