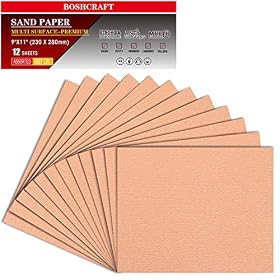
Open-coat 80-grit sandpaper is a practical starting point for removing rough mill marks, old finish, and uneven areas from resinous softwood. Its open spacing helps reduce loading from pitch, but it still requires the right technique and a finer follow-up grit.
Open-coat 80-grit sandpaper can work well on resinous softwood when you need fast stock removal. The open coating leaves more space between abrasive grains, helping sawdust and sticky resin escape instead of packing the surface immediately. Use it for leveling rough boards, removing stubborn finish, or correcting uneven areas—but expect visible scratches and plan to follow it with finer grits.
Why open-coat 80 works on resinous softwood
Resinous softwoods such as pine, fir, and some cedar can clog abrasive paper quickly. Heat and pressure soften the resin, which then fills the spaces between abrasive grains. Once loaded, the paper cuts poorly and may smear the surface rather than remove material.
Open-coat paper has abrasive grains distributed with more spacing than closed-coat paper. That spacing provides room for dust and resin to clear. The result is usually a better choice for early sanding on pitchy or gummy wood than a tightly packed abrasive.
An 80-grit abrasive is coarse enough to:
Remove rough saw marks and mill marks
Level small ridges or uneven joints
Strip some old paint, varnish, or other finishes
Correct localized scratches or surface damage
Prepare unfinished wood for medium-grit sanding
It is not a finishing grit. On visible wood, 80 grit can leave deep scratches that remain noticeable after staining or clear coating.
When to buy open-coat 80 grit
Choose it when the main problem is material removal and the wood is clogging ordinary sandpaper. It is especially useful for rough lumber, reclaimed softwood, resinous knots, and surfaces with a stubborn existing coating.
For a large flat area, choose the format that matches your tool:
Sheets: For hand sanding, sanding blocks, and finishing smaller areas
Discs: For random-orbit sanders; check the disc diameter, hole pattern, and attachment style
Belts: For belt sanders; match the exact belt dimensions and use care because removal is aggressive
Pre-cut pads or rolls: Useful for detail sanding, edges, and irregular surfaces
Look for paper specifically described as open coat or open-coated. “80 grit” alone does not tell you how well the abrasive will resist resin loading.
Product prices and availability are accurate as of the date/time indicated and are subject to change. Any price and availability information displayed on Amazon.com at the time of purchase will apply to the purchase of this product.
How to use it without making the surface worse
Start with the least aggressive tool and pressure that solves the problem. Let the abrasive do the cutting rather than forcing the sander into the wood. Excessive pressure creates heat, accelerates clogging, and can leave uneven low spots.
Keep the sander moving, particularly on softwood. Holding it in one place can dish the surface or create swirl marks. On a flat board, work with the grain when sanding by hand. With a power sander, use controlled, overlapping passes and avoid tilting the tool onto an edge.
For hand sanding, a sanding block helps distribute pressure. Sanding with loose paper alone can follow soft spots and produce an uneven surface.
If the abrasive becomes shiny, clogged, or noticeably less effective, replace it rather than pressing harder. Cleaning products or abrasive-cleaning sticks may be suitable for some sanding belts and discs, but follow the abrasive and tool manufacturer's instructions. Do not use a cleaning method that could damage the backing or create a safety hazard.
Product prices and availability are accurate as of the date/time indicated and are subject to change. Any price and availability information displayed on Amazon.com at the time of purchase will apply to the purchase of this product.
A sensible grit progression
After open-coat 80 grit has leveled the surface, remove its scratches with a medium grit. A common progression is:
80 grit: Initial leveling and heavy removal
100 or 120 grit: Refining coarse scratches
150 or 180 grit: Preparing many wood surfaces for finish
220 grit or finer: Only when the finish instructions call for it
Do not skip directly from 80 to a very fine grit unless the surface is small and the remaining scratches are already shallow. Fine paper can polish the tops of coarse scratches while leaving the deeper marks visible.
The correct stopping point depends on the finish. Some stains and clear finishes specify a maximum or minimum sanding grit. Sanding resinous softwood excessively fine can also reduce stain absorption and make color less uniform, so follow the coating manufacturer's instructions.
Product prices and availability are accurate as of the date/time indicated and are subject to change. Any price and availability information displayed on Amazon.com at the time of purchase will apply to the purchase of this product.
How to reduce resin buildup
Use light to moderate pressure and avoid generating unnecessary heat. Empty dust collection containers and keep filters clear so dust can leave the sanding area. A clogged dust-extraction system can increase loading and reduce visibility.
On a power sander, confirm that the disc or pad is seated flat and that the tool's dust ports are not blocked. A warped backing pad or poorly attached disc can cause uneven wear and concentrated heat.
For especially sticky wood, allow the surface and abrasive to cool between passes. If a board has large areas of hardened pitch, remove raised deposits carefully with a suitable hand scraper before sanding. Keep the scraper flat enough to avoid gouging the wood, and follow safe handling practices.
Open coat versus closed coat
Open-coat abrasive is generally the better starting point when resin, paint, or softwood dust is likely to clog the paper. Closed-coat abrasive places more grains over the backing and can provide a more uniform cutting surface, but it may load faster in gummy materials.
That does not make open coat the best choice for every task. A closed-coat abrasive may be useful later for refining a clean, dry surface, depending on the material and finish. The important buying factors are the grit, abrasive format, backing, and whether the product is intended for hand or machine sanding.
When 80 grit is too aggressive
Do not start with open-coat 80 grit if the surface is already smooth and your goal is only to prepare it for a new coat of finish. Start with a finer grit recommended by the coating manufacturer. Coarse paper can remove more material than necessary and create scratches that take additional sanding to eliminate.
Use extra caution on veneer, thin edges, end grain, and soft areas around knots. These areas can sand through or become uneven quickly. For delicate work, begin with a finer abrasive in an inconspicuous area and inspect the result before proceeding.
Buying checklist
Before ordering, verify:
Grit: 80 for aggressive initial removal, not final finishing
Coating: Open coat or open-coated for better resistance to loading
Abrasive format: Sheet, disc, belt, or roll to match your tool
Dimensions: Correct size for the sander or sanding block
Attachment: Hook-and-loop, pressure-sensitive adhesive, or plain backing as required
Dust holes: Matching hole pattern if using a power sander
Backing strength: Flexible for hand work; more durable backing for demanding machine sanding
Follow-up grits: Medium and fine abrasives for removing 80-grit scratches
If the paper clogs almost immediately despite light pressure and good dust extraction, the problem may be unusually resinous wood, excess heat, a blocked sander, or an abrasive format unsuited to the job. Try a fresh open-coat abrasive, reduce pressure, and check the tool before assuming the wood cannot be sanded effectively.
For large areas that remain uneven after several fresh abrasives, or when a power sander is removing material unpredictably, stop and reassess the tool, sanding direction, and board condition. A planer, scraper, or professional help may be more appropriate than continuing with coarse paper.
FAQ
Is open-coat 80 grit good for pine?
Yes, it can be a good choice for rough or resinous pine because the open coating helps reduce clogging. It is intended for aggressive initial sanding, so follow it with medium and finer grits before finishing.
Will open-coat 80 grit remove pine resin?
It can remove wood and some surface resin, but heavy or raised pitch may clog the abrasive. Carefully scraping thick deposits first, using light pressure, and allowing the surface to stay cool can help.
Can I finish wood after sanding with 80 grit?
Usually not directly. Sanding with 80 grit commonly leaves scratches that show through stain or clear finish. Use progressively finer grits and follow the finish manufacturer's sanding recommendations.
Should I use open-coat or closed-coat sandpaper on softwood?
Open-coat is generally preferable for resinous or easily clogged softwood during coarse sanding. Closed-coat paper may be useful for later refinement when loading is less of a problem.