Best block for keeping a tablesaw top flat while you sand
A hard, flat sanding block is the safest choice for maintaining a flat tablesaw top. Learn which block styles work, which abrasives to use, and how to avoid removing metal unevenly.
A rigid, flat sanding block is the best choice for keeping a tablesaw top flat while you sand. Use a block long and hard enough to bridge small surface irregularities, pair it with the right abrasive, and use light, even strokes. Avoid soft sanding sponges and sanding by hand with loose paper, since they can follow low spots or concentrate pressure in one area.
What to look for in a tablesaw sanding block
A hard, rigid sanding surface
Choose a block that does not flex under hand pressure. A rigid block helps distribute pressure across a broader area instead of allowing your fingers to press the abrasive into isolated spots.
A sanding block made from hard plastic, rubber-backed rigid material, or another stable material can work, provided the sanding face remains flat. Very soft foam blocks are better for curved or contoured work, not for maintaining a flat cast-iron saw table.
Enough length to bridge uneven areas
A longer block generally does a better job of preserving a flat surface because it bridges small high and low spots. A small block is useful around the miter slots, corners, and throat plate opening, but it is less suitable for broad flattening work.
For the main table surface, use the largest rigid block that you can control comfortably. Keep a smaller block available for edges and confined areas rather than tilting a large block into the slots.
A secure way to hold the abrasive
The abrasive should stay flat and tight against the block. Useful attachment methods include:
Clamps or clips that keep a sheet from slipping
Hook-and-loop backing when the block is designed for it
Pressure-sensitive adhesive paper made for sanding blocks
A replaceable abrasive sleeve or wrap
Avoid a loose sheet that bunches beneath your fingers. Wrinkles can create concentrated scratches and make it harder to keep the surface even.
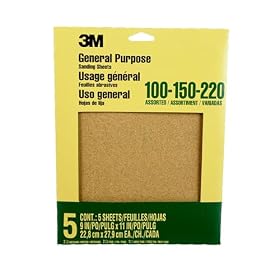
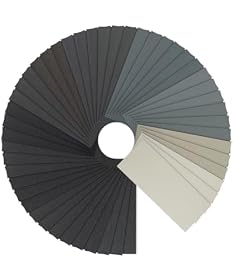
Choose the abrasive for the condition of the top
The block controls flatness, but the abrasive controls how aggressively you remove rust, residue, or oxidation.
Light surface oxidation or residue
Start with a fine or medium-fine abrasive and use light pressure. This is usually preferable when the tabletop is mostly clean and you are removing discoloration, residue, or minor oxidation rather than heavy rust.
Heavier surface rust
A coarser abrasive may be needed for isolated rust, but begin with the least aggressive option likely to work. Work on the affected area without aggressively grinding the surrounding metal. Replace the abrasive when it loads up instead of pressing harder.
Do not treat deep pitting as a normal sanding problem. Removing enough metal to erase deep pits can change the table's geometry and may make the saw less useful for accurate work.
Final smoothing
After the problem is removed, switch to a finer abrasive and make lighter passes. The exact grit sequence depends on the table's condition and the abrasive manufacturer's recommendations. The goal is a clean, smooth surface—not a mirror finish that requires unnecessary metal removal.
Product prices and availability are accurate as of the date/time indicated and are subject to change. Any price and availability information displayed on Amazon.com at the time of purchase will apply to the purchase of this product.
How to sand without creating low spots
Disconnect the saw from power. Unplug it or follow the manufacturer's approved lockout procedure. Remove loose accessories from the table.
Clean the surface first. Vacuum or wipe away dust and debris so grit does not drag across the metal.
Protect the openings. Keep abrasive dust and rust particles out of the miter slots, throat plate opening, handwheel areas, and other mechanisms. Cover openings as appropriate without interfering with the saw.
Attach fresh abrasive to the block. Make sure it is smooth, secure, and free of folds.
Use light, even pressure. Let the abrasive cut instead of forcing it into the surface.
Sand in overlapping directions. Change direction periodically so you do not create a pronounced pattern or concentrate wear in one path.
Check the surface often. Wipe it clean and inspect for remaining rust, scratches, or uneven areas before changing to a more aggressive abrasive.
Clean and protect the top. Remove all abrasive residue, then apply a tablesaw-top protectant or other product approved by the saw manufacturer. Avoid products that leave a residue likely to interfere with finishing or glue-up work.
Product prices and availability are accurate as of the date/time indicated and are subject to change. Any price and availability information displayed on Amazon.com at the time of purchase will apply to the purchase of this product.
When a sanding block is not the right tool
A sanding block is suitable for surface cleanup and light smoothing. It is not a substitute for machining a warped or severely damaged table. If a straightedge reveals a significant hollow, crown, or twist, aggressive hand sanding can remove more metal without truly correcting the problem.
Stop and seek advice from the saw manufacturer or a qualified machinery technician if:
The table is visibly warped or twisted
The miter slots no longer align correctly with the blade
The blade does not remain parallel to the miter slot after adjustment
Deep rust pits cover a large area
A previous owner has already ground or sanded the surface unevenly
For ordinary surface rust, a rigid block and controlled hand sanding are usually more appropriate than a power sander. A power sander can remove material unevenly, round edges, damage slot edges, and make it harder to preserve the table's flat reference surface.
Product prices and availability are accurate as of the date/time indicated and are subject to change. Any price and availability information displayed on Amazon.com at the time of purchase will apply to the purchase of this product.
Rigid block versus sanding sponge
A sanding sponge conforms to the surface. That makes it useful for profiles, edges, and curved parts, but it is a poor primary choice when flatness matters. It can dip into low areas and apply more pressure beneath the user's fingers.
A rigid sanding block keeps the abrasive more planar and gives you better control over pressure. A sanding sponge can still be useful for carefully treating a narrow edge or awkward corner after the main surface has been handled with a rigid block.
The practical buying decision
For a tablesaw top, prioritize these features in order:
Rigid, non-flexing construction
A flat sanding face
A length suitable for the main table area
Reliable abrasive retention
A comfortable grip that does not encourage excessive pressure
If the table only needs occasional cleaning, a reusable rigid block with replaceable sheets is usually more flexible than a specialized abrasive pad. If you regularly maintain multiple cast-iron tools, buying a block that accepts common sheet or roll abrasives can simplify replacement and grit selection.
FAQ
What type of sanding block is best for a tablesaw top?
Use a rigid, flat sanding block that does not flex under hand pressure. A longer block is generally better for broad surfaces because it helps bridge small irregularities, while a smaller rigid block can handle corners and confined areas.
Can I use a sanding sponge on a tablesaw top?
A sanding sponge is not the best primary tool because it conforms to the surface and can create uneven pressure. Reserve it for limited edge or detail work, and use a rigid block for the main tabletop.
What grit should I use to remove rust from a tablesaw top?
Use the least aggressive grit that will remove the specific rust or residue, then move to a finer abrasive for smoothing. The right sequence depends on the severity of the oxidation and the abrasive manufacturer's guidance; deep pitting should not be removed by aggressive sanding.
Can sanding flatten a warped tablesaw top?
Normal hand sanding is intended for surface cleanup, not correcting a warped or twisted table. Aggressive sanding can remove metal unevenly. Have significant distortion assessed by the manufacturer or a qualified machinery professional.
Should I use a power sander on a cast-iron tablesaw top?
Hand sanding with a rigid block is generally easier to control for preserving flatness. A power sander can remove material unevenly, round edges, or damage slot edges, so follow the saw manufacturer's guidance before using one.