Swirl marks usually mean coarse scratches were skipped over, the abrasive is worn or loaded, or the sander is leaving circular scratches. Stop before staining, identify the cause, and sand the marks out with a sensible grit progression.
Swirl marks before staining are usually scratches from the sander or coarse grit that a finer grit did not fully remove. Don’t stain over them: stain can make the marks more visible. Check the abrasive and sanding technique, then resand with a progression that removes each previous grit’s scratches. Follow the stain maker’s directions for the final grit, since sanding too fine can also affect stain absorption.
Identify the scratch pattern
Look across the surface in angled light. Circular arcs or pigtails often point to debris under the sanding pad, a worn or clogged disc, or too much pressure with a random-orbit sander. Straight scratches commonly mean a coarse grit’s marks remain or the last sanding pass crossed the grain.
If you’re unsure, make a small test area and inspect it in the same light. Don’t apply stain until the surface looks even and the sanding scratches are gone.
Check the abrasive and sander first
Replace worn or clogged paper. A loaded abrasive cuts poorly and may rub dust and debris across the wood. Use a fresh piece or disc of the correct size and attachment pattern.
Check for grit or debris under the pad. Unplug a corded sander or remove the battery before checking. Clean the backing pad and work surface; a stray grain of grit can leave a deep circular scratch.
Check the pad and setup. Make sure the abrasive lies flat and is secured as the tool instructions specify. A damaged or uneven pad can produce inconsistent scratches.
Let the sander do the work. Keep it moving steadily, use light pressure, and avoid tilting it on an edge. Heavy pressure can make scratches worse and may slow the abrasive’s cutting.
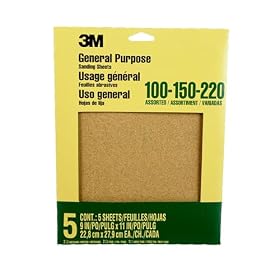
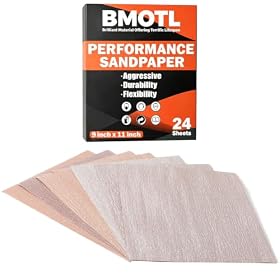
Choose replacement abrasives for a grit progression
Product prices and availability are accurate as of the date/time indicated and are subject to change. Any price and availability information displayed on Amazon.com at the time of purchase will apply to the purchase of this product.
Sand out the marks with a grit progression
Return to a grit coarse enough to remove the visible scratches, but no coarser than necessary. Then move through intermediate grits rather than jumping straight to a very fine abrasive. Each step should remove the scratches left by the previous one; if the old marks remain, repeat that step before moving finer.
For many wood projects, a progression might move from around 80 or 100 grit through 120 and then to 150 or 180. This is only a starting point: the wood, finish, stain instructions, and depth of the scratches determine the right sequence. Some stains call for a coarser final sand so the wood can absorb stain evenly. Check the product directions, and test the complete sanding and staining process on scrap or an inconspicuous area when possible.
Use a sanding block for hand sanding so pressure stays even. Make the final pass with the grain, especially on surfaces where cross-grain scratches would show. Between grits, remove sanding dust from the work and inspect it in angled light before continuing.
Product prices and availability are accurate as of the date/time indicated and are subject to change. Any price and availability information displayed on Amazon.com at the time of purchase will apply to the purchase of this product.
When to stop and replace something
Replace the abrasive if it is worn, torn, clogged, or no longer cutting evenly. Replace or service a damaged sanding pad according to the tool maker’s instructions if a fresh, correctly fitted disc still produces uneven circular marks.
If the marks remain after you’ve corrected the setup and sanded through the appropriate grit steps, don’t keep sanding blindly with finer paper. Reassess the scratch depth and return to the least aggressive grit that will remove it. For veneer or a thin finish layer, sand cautiously; if removing the marks risks sanding through the surface, consult a refinishing professional before continuing.
FAQ
Can I hide swirl marks by applying stain?
Usually not. Stain often makes sanding scratches more noticeable, so remove the marks and inspect the wood before staining.
What grit should I finish with before staining?
It depends on the wood and stain. Follow the stain maker’s instructions: sanding too fine can reduce stain absorption, while too coarse a finish can leave visible scratches.
Why does my random-orbit sander leave pigtail marks?
Common causes include grit or dust trapped under the disc, a clogged or worn disc, a damaged pad, or excess pressure. Unplug or remove the battery before checking the tool, then try a clean surface and fresh, correctly fitted abrasive.