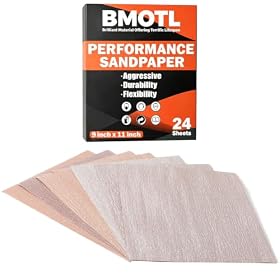
Stop when the surface is uniformly smooth and free of visible sanding scratches—not simply when it feels polished. The right final grit depends on the wood and the stain maker’s instructions.
The short answer
Stop sanding when the wood is evenly smooth, has no visible scratches from coarser grits, and matches the final grit recommended by your stain manufacturer. Don’t automatically sand to the finest paper you have: sanding too fine can reduce or unevenly change stain absorption, while stopping too early can leave scratches that stain makes more noticeable.
Product prices and availability are accurate as of the date/time indicated and are subject to change. Any price and availability information displayed on Amazon.com at the time of purchase will apply to the purchase of this product.
Choose the final grit for the wood and stain
There isn’t one final grit that works for every project. Many jobs finish somewhere around 120–180 grit, but the appropriate stopping point depends on the wood species, the stain, and the product directions. Some products call for a specific final grit, so follow that before relying on a general rule. Sanding to a much finer grit, such as 220, is not automatically better before stain.
If you’re unsure, test the stain on an offcut of the same wood. Sand the sample to your intended final grit, apply the stain as directed, and compare it with a sample sanded to a different grit. This is especially useful when color or evenness matters.
Product prices and availability are accurate as of the date/time indicated and are subject to change. Any price and availability information displayed on Amazon.com at the time of purchase will apply to the purchase of this product.
Check that the surface is ready
Before stopping, check the wood in bright, angled light. Look for cross-grain scratches, shiny or dull patches, and areas that appear smoother than the rest. Rub the surface lightly with your hand to find rough spots, but don’t use touch alone: fine scratches can be hard to feel and become obvious after staining.
Work through grits in order, removing the scratches left by the previous grit before moving on. Don’t skip a grit if the next one cannot remove the deeper scratches efficiently. Sand edges and corners carefully; it’s easy to cut through a veneer or round over a crisp edge.
If you plan to use a water-based finish and want to limit grain-raising after application, follow the finish maker’s directions about pre-raising the grain. This step is not necessary for every stain or finish, and the wood generally needs to dry before the final light sanding.
Clean up before applying stain
Remove sanding dust from the surface and nearby crevices with a vacuum or brush, then use a clean, lint-free cloth if appropriate for your stain. Follow the product directions for surface preparation; some wiping materials can leave residue. Make sure the wood is dry and free of dust before staining.
If the stain looks blotchy on your test piece, the cause may be the wood itself rather than a need for more sanding. Some species absorb stain unevenly. A compatible wood conditioner or a different staining method may help, but check product compatibility and test it first.
FAQ
Is 220 grit too fine before staining?
Not always, but it can limit or change stain absorption on some woods. Follow the stain maker’s recommended final grit and test on an offcut before sanding the whole project to 220.
Can I stain after sanding with 120 grit?
Possibly. Whether 120 grit is suitable depends on the wood and stain instructions. Check for remaining scratches and test the color and absorption on a matching scrap.
Should I wipe wood with water before staining?
Only if it’s part of the preparation method recommended for your wood and finish. Water can raise the grain, so allow the wood to dry and follow the product directions before staining.