If hand sanding with paper is taking too long, a belt sander is not automatically the right next step. It removes material quickly and can leave deep scratches, round edges, or cut through veneer before you can react. Try fresh, suitable-grit paper or a sanding block first; choose a gentler powered sander only when the surface and amount of material to remove call for it.
Comparisons · Mon Sep 21
When a belt sander is the wrong next step after paper
If sanding with paper feels slow, a belt sander may seem like the obvious upgrade—but it can remove material too quickly. First check the abrasive, the surface, and the finish you need.
Why a belt sander can be the wrong next step
A belt sander is best suited to substantial, controlled stock removal on broad, relatively flat surfaces. Its speed is a drawback when you need a fine finish, have thin veneer, are sanding near an edge, or need to preserve a crisp profile. A brief, uneven pass can leave a low spot or visible scratch pattern that takes more work to correct.
It is also a poor match for curved details, narrow trim, and small parts that are hard to hold securely. For those jobs, a hand-held abrasive lets you feel the surface and control pressure more easily.
Hand-sanding paper for controlled material removal and finishing
 BOSHCRAFT 50 Pcs 1/4 Sheet Sand Paper 5.5" x 4.5" – 80/150/320/400 Grit 8 Sheets…BOSHCRAFT
$13.99 as of
View on Amazon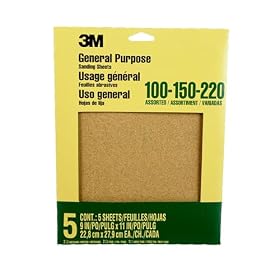 3M Aluminum Oxide Sandpaper, 5 Sheets, Assorted Grit 100-150-220, 9 x 11 in3M
$5.48 as of
View on Amazon Fandeli | Multi-Purpose Sanding Paper | Assorted Grits (80,120,220) | 25 Sheets of 9'' x…Fandeli
$18.51 as of
View on Amazon
Product prices and availability are accurate as of the date/time indicated and are subject to change. Any price and availability information displayed on Amazon.com at the time of purchase will apply to the purchase of this product.
Check the paper before changing tools
Paper that is clogged, worn, or too fine for the work can make sanding seem ineffective. Replace it if it is loaded with dust or no longer cuts well. Match the grit to the job: use a coarser abrasive for removing material, then move to finer grits to refine scratches. Avoid jumping straight from very coarse paper to a fine finishing grit, since the deeper marks may remain visible.
For flat areas, wrap a sheet around a sanding block to keep pressure even and reduce the chance of finger-shaped dips. Use a sanding sponge where the surface has gentle curves or molded contours. Sand with the grain on wood, and clear dust between grit changes so loose particles do not create new scratches.
A flat sanding block for even hand sanding
 SCOTTCHEN Hand Sanding Blocks Auto Body, 25pcs Sandpaper Woodworking Furniture Sander Hand Tool, Grit 120…SCOTTCHEN
$9.99 as of
View on Amazon TOVPADE 54PCS Premium Micro Sander, Detail & Mini Sander Block – Precision Small Hand Sanding…Tovpade
$9.99 as of
View on Amazon Milescraft 1622 Sand-It Multi-Surface Sanding Block. Sand Flat, Concave, Convex & Round Surfaces or Fit…Milescraft
$6.99 as of
View on Amazon
Product prices and availability are accurate as of the date/time indicated and are subject to change. Any price and availability information displayed on Amazon.com at the time of purchase will apply to the purchase of this product.
Choose a gentler alternative when the surface needs control
- Flat panels that need smoothing: A sanding block and fresh paper provide control without the rapid stock removal of a belt sander. For larger panels, a random-orbit sander with the appropriate discs may be more manageable; keep it moving and follow the tool maker’s instructions.
- Curves and profiles: A sanding sponge can conform to the shape better than a rigid belt or block. Use light pressure to avoid flattening details.
- Paint or finish between coats: Use the abrasive and grit recommended for the coating. The goal is usually to lightly smooth or key the surface, not to strip it back to bare material. Do not sand a coating that may contain hazardous material unless you have confirmed safe handling and dust-control requirements.
- A small rough spot or raised grain: Hand sanding with a suitable grit may be all that is needed. A power sander can remove sound surrounding material unnecessarily.
Flexible abrasives for curved or contoured surfaces
 4 Pack Hand Sanding Sponge Set -120 220 320 400 Grit- Coarse Medium Fine Grit…SACKORANGE
$4.59 as of
View on Amazon 8 Pack Hand Sanding Sponge Set -120 220 320 400 Grit- Coarse Medium Fine Grit…SACKORANGE
$5.99 as of
View on Amazon BOSHCRAFT 10 Pcs Sanding Sponge Set, 220 Grit: 4 Pcs, 60/80/100/120/180 Grit: 2 Pcs Each,…BOSHCRAFT
$7.99 as of
View on Amazon
Product prices and availability are accurate as of the date/time indicated and are subject to change. Any price and availability information displayed on Amazon.com at the time of purchase will apply to the purchase of this product.
When a belt sander does make sense
Consider a belt sander when you need to remove a meaningful amount of material from a broad, flat workpiece and can keep the tool level and moving. It may be appropriate for tasks such as flattening a rough board, but it is not a substitute for controlled finish sanding. Check the workpiece and tool instructions, secure the material, use suitable dust protection, and keep the belt away from edges or thin surfaces unless you can control the cut safely.
If paper and hand sanding are still slow, first confirm that the grit is appropriate and the abrasive is cutting. Then choose a tool based on the surface: controlled hand sanding for details, a sponge for contours, or a less aggressive powered sander for larger areas that need smoothing. If the job truly requires heavy stock removal, a belt sander may be reasonable—but use it only where its speed will not compromise the surface.
Abrasive discs for a gentler powered-sanding alternative
 WORKPRO 80-Piece Sanding Disc Set,5-Inch 8-Hole Hook and Loop Sanding Discs, 60, 80, 100, 120,…WORKPRO
$14.19 as of
View on Amazon Aiyard 5-Inch 8-Hole Hook & Loop Sanding Discs 60-400 Mixed Grits, 105-PackAiyard
$18.99 as of
View on Amazon YNZDRWA 70 PCS 5 Inch 8-Hole Sanding Discs, 9 Mixed GritsYNZDRWA
$6.99 as of
View on Amazon
Product prices and availability are accurate as of the date/time indicated and are subject to change. Any price and availability information displayed on Amazon.com at the time of purchase will apply to the purchase of this product.
FAQ
Should I use a belt sander to remove paint?
Only if the surface and coating are suitable for fast material removal and you can control the tool without damaging the substrate. For thin or detailed areas, hand sanding or a gentler method is easier to control. Confirm that the coating can be safely sanded and follow appropriate dust-control guidance.
What should I use instead of a belt sander on a flat wood panel?
For a small area, use sandpaper on a flat sanding block. For a larger panel that needs smoothing, a random-orbit sander with suitable abrasive discs may be more manageable. Use light, even pressure and progress through grits as needed.
Why is sandpaper not removing material?
The abrasive may be worn or clogged, or the grit may be too fine for the amount of material you need to remove. Replace loaded paper and choose a coarser grit if appropriate for the surface, then refine the scratches with finer grits.