A light sanding between coats smooths dust nibs and raised grain and can help the next coat bond. Wait until the finish is ready to sand according to its label, then use a fine abrasive with light pressure. The goal is to dull and smooth the surface—not remove the coat or expose the wood.
Technique · Sat Sep 19
How to sand between coats
A light scuff between coats can smooth raised grain and help the next layer adhere. Let the finish dry as directed, use fine abrasive with minimal pressure, and remove all dust before recoating.
Check whether the finish needs sanding
Follow the finish maker’s recoat and sanding instructions first. Some products need an intercoat scuff; others bond best when recoated within a specified window and may not need sanding. Sanding too soon can gum up the abrasive or tear the finish, while waiting too long may mean the surface needs scuffing before recoating.
If the coat feels rough, has dust nibs, or the instructions call for sanding, a gentle scuff is usually appropriate. Don’t sand through a thin coat or round over edges. If you expose bare wood, repair that spot as needed and let it dry before continuing.
Fine abrasive for between-coat sanding
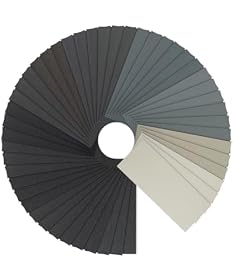 Bates Choice Sandpaper, 48 pcs, 120-5000 Grit, Aluminum Oxide, Wood, Metal, Plastic, 9 x 3.6…Bates Choice
$4.35 as of
View on Amazon BOSHCRAFT 400 Grit Sand Paper 9" x 11", 12 Sheets – Premium Aluminum Oxide Sandpaper…BOSHCRAFT
$6.99 as of
View on Amazon
Product prices and availability are accurate as of the date/time indicated and are subject to change. Any price and availability information displayed on Amazon.com at the time of purchase will apply to the purchase of this product.
Choose a fine grit and sand lightly
For many clear wood finishes, 220-grit is a common starting point for between-coat sanding; finer paper, such as 320 grit, may suit a delicate or already smooth surface. The right choice depends on the finish and its instructions. Use a sanding sponge or a flat block on broad areas to help distribute pressure, and use a light touch on corners and edges.
Sand with the grain when working on wood. On a flat panel, use even strokes and stop once the surface feels uniformly smooth and looks lightly dulled. Avoid aggressive sanding or coarse paper: the objective is to knock down small imperfections, not level the finish like a bare-wood sanding step.
Hand sanding aid for delicate surfaces
 4 Pack Hand Sanding Sponge Set -120 220 320 400 Grit- Coarse Medium Fine Grit…SACKORANGE
$4.59 as of
View on Amazon 3M Pro Grade Precision 3-in-1 Sanding Sponge, 320 Grit X-Fine, 2 Sponges, Washable & Reusable,…3M
$9.99 as of
View on Amazon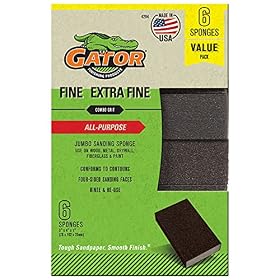 Gator Multi-Surface Sanding Sponge, Extra Fine/Fine GritGator
$13.51 as of
View on Amazon
Product prices and availability are accurate as of the date/time indicated and are subject to change. Any price and availability information displayed on Amazon.com at the time of purchase will apply to the purchase of this product.
Remove dust before recoating
Vacuum the surface with a clean brush attachment, then wipe it with a clean, lint-free cloth if the finish maker permits. Avoid leaving moisture, cleaner residue, or fibers behind. Let any approved cleaning method dry completely before applying the next coat.
Wear eye protection and a suitable dust mask, and keep dust away from ignition sources when sanding flammable finishes. If you are sanding old paint that could contain lead, do not dry-sand it; follow applicable lead-safe guidance or contact a qualified professional.
When sanding between coats goes wrong
- The abrasive clogs or drags: The coat may not be dry enough, or the abrasive may be unsuitable. Stop, let the finish dry longer as directed, and replace clogged paper.
- The surface develops deep scratches: Use a finer abrasive and lighter pressure. If the next coat does not hide the marks, allow it to dry and correct them gently before proceeding.
- You sand through to bare wood: Stop rather than widening the bare patch. Restore the finish in that area according to the product directions before applying another full coat.
- The finish peels or fails to adhere: Check the stated recoat window, surface cleanliness, and compatibility of the products. If a broad area is lifting, follow the finish maker’s repair instructions rather than coating over it.
If the abrasive has worn out, replace it; dull paper can burnish or scratch instead of cutting cleanly. If the finish is broadly peeling, contaminated, or damaged through multiple layers, removing the failed finish and restarting may be more reliable than adding more coats.
FAQ
What grit should I use between coats of polyurethane?
Check the product label first. For many clear wood finishes, 220-grit is a common starting point, while 320 grit can be appropriate for a delicate or already smooth surface. Use light pressure and avoid sanding through the coat.
Do I have to sand between every coat?
Not always. Some finishes call for an intercoat scuff, while others can be recoated within a specified window without sanding. Follow the product instructions and sand if needed to smooth imperfections or prepare a surface outside that window.
Should I sand the final coat?
Usually not if you want the finish to remain as applied. Sanding or polishing the final coat is a separate finishing step and can change its sheen; do it only if that result is intended and the finish instructions allow it.