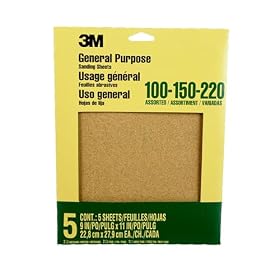
Starting with fine sandpaper can make little progress on rough wood, old finish, or visible scratches. Use a grit coarse enough for the work, then move up only when the previous scratches are gone.
If sanding is taking too long, the grit may be too fine to remove the roughness, finish, or scratches you need to address. Switch to a coarser grit, sand until the problem is gone, then move to finer grits to remove the scratches left by the coarser paper.
Check whether your starting grit is too fine
You may have started too fine if the surface still has the same defects after several minutes, the paper seems to polish rather than cut, or the finish is barely changing. Fine paper is meant to refine a surface; it is inefficient for leveling deep scratches, rough edges, or stubborn finish.
Stop and wipe away the dust so you can see what remains. Check the surface under light coming from the side. If deep scratches, uneven areas, or finish remain, a finer grit is unlikely to fix them quickly.
Choose a grit that matches the work
Use the least aggressive grit that removes the problem at a reasonable pace. As a general starting point for wood, 60–80 grit can help with heavy removal or rough surfaces, while 80–120 grit is often more suitable for routine smoothing. These are starting ranges, not rules: wood species, finish, tool, and the condition of the surface all matter.
For light smoothing between coats of finish, much finer paper may be appropriate—but follow the finish maker’s instructions. Do not use a coarse grit on a thin veneer or delicate finished surface unless you are prepared to remove material or the coating.
Product prices and availability are accurate as of the date/time indicated and are subject to change. Any price and availability information displayed on Amazon.com at the time of purchase will apply to the purchase of this product.
Fix the grit progression
Return to a coarser grit. Choose one that can remove the remaining defect without cutting more material than necessary. If you started at 180 grit on rough stock, for example, moving back to around 80 or 100 may be more effective; the right choice depends on the surface.
Sand until the original problem is gone. Keep the tool moving and use even pressure. Check often rather than sanding longer in one spot.
Remove dust and inspect. Dust can hide scratches. Wipe or vacuum the surface before deciding whether to move on.
Step up in grit. Use the next finer grit to remove the scratches from the previous one. If those scratches remain, keep sanding at the current grit rather than advancing.
Stop at the grit your finish requires. Going finer than necessary can waste time and, on some surfaces, make it harder for a coating to adhere. Check the coating manufacturer’s preparation directions.
You usually do not need to use every grit in a set. The key is not to skip so far ahead that the finer paper cannot erase the scratches from the coarser grit.
Product prices and availability are accurate as of the date/time indicated and are subject to change. Any price and availability information displayed on Amazon.com at the time of purchase will apply to the purchase of this product.
Check the paper and sanding setup
Before assuming the grit is wrong, make sure the abrasive is still cutting. Loaded or worn paper can feel ineffective, especially when sanding paint, resinous wood, or other material that clogs the abrasive. Replace clogged paper instead of pressing harder; excess pressure can create uneven sanding or heat.
Also check that the paper matches the tool and is attached flat. A loose, folded, or mismatched sheet or disc can leave uneven marks. For hand sanding, a block helps keep pressure even on flat surfaces; use a softer backing where the surface is curved or delicate.
Wear suitable eye and respiratory protection and use dust collection when possible. If an old coating may contain lead or another hazardous material, do not dry-sand it; follow applicable safety guidance or consult a qualified professional.
When to replace the paper or change the approach
Replace the abrasive if it is torn, glazed, clogged, or no longer cutting after you clean off the dust. If fresh, correctly fitted paper still removes material very slowly, reassess the starting grit and the type of defect. Deep gouges, uneven boards, or a thick coating may require a different removal method; avoid compensating by bearing down hard.
If sanding through a veneer, removing material from a delicate surface, or working on a hazardous coating, stop before continuing and confirm the appropriate method. A coarser grit is not always the safer or faster choice.
FAQ
What grit should I start with when sanding wood?
It depends on the condition of the wood. Rough surfaces or heavy removal may call for about 60–80 grit, while routine smoothing often starts around 80–120 grit. Use the least aggressive grit that removes the defect, and take care with veneer and thin surfaces.
Can I skip grits when sanding?
Sometimes, but a large jump can leave scratches that the next finer grit cannot remove efficiently. Move up in grit when the previous scratches are gone, and do not assume you need every grit in a set.
Why is my sandpaper not cutting?
It may be too fine, worn, or clogged with dust or finish. Clean the surface and paper, inspect the abrasive, and replace it if it is loaded or worn. If the paper is fresh, try a coarser grit suited to the material and task.